Setting Up a GoDex DT4 Printer
- Load label roll into Printer as per Printer Instruction
- Plug in printer to electric power and USB cable to computer
- Install Printer drivers from CD disk that was packaged with Printer
- Right click GoDex DT4 (If your printer is named GoDex DT4x, please rename it without the X) and select Printing Preferences
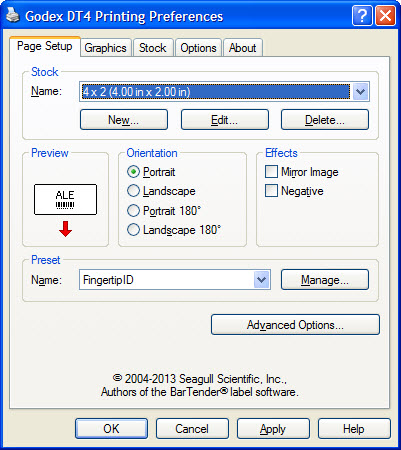
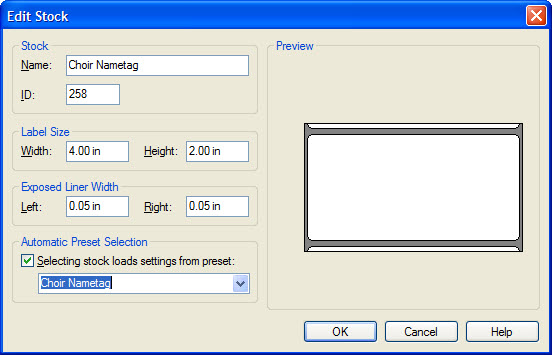
Edit Nametag Size
- Click New
- Give the Nametag name (like Choir Nametag)
- Set the width at 4.00 in and the height at 2.00 in
- Set Automatic Preset Selection with the name of your nametag (like Choir Nametag)
- Click OK
- Go back to Printing Preferences
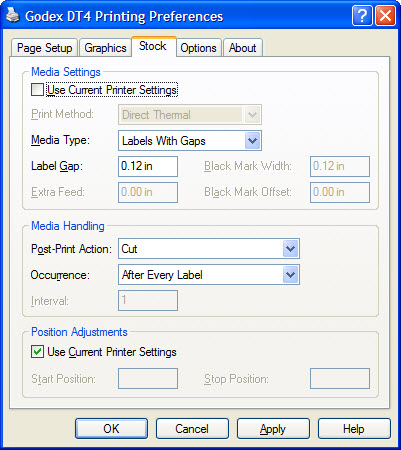
Edit Cutting Nametag After Printing
- Click Stock
- Set Media Handling Post -Print Action to Cut
- Set Occurrence to After Every Label
- Set Position Adjustments Stop Position to 1.24 in
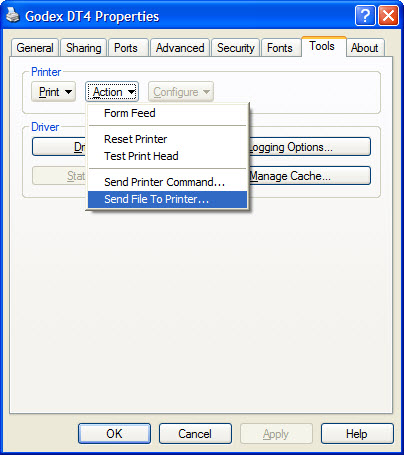
Trouble-shooting Misaligned Labels
- Open Printer Properties for GoDex DT4 printer
- Click Tools
- Select Action
- Select Send file to Printer
- Browse for the GodexRescueScript.txt file
-