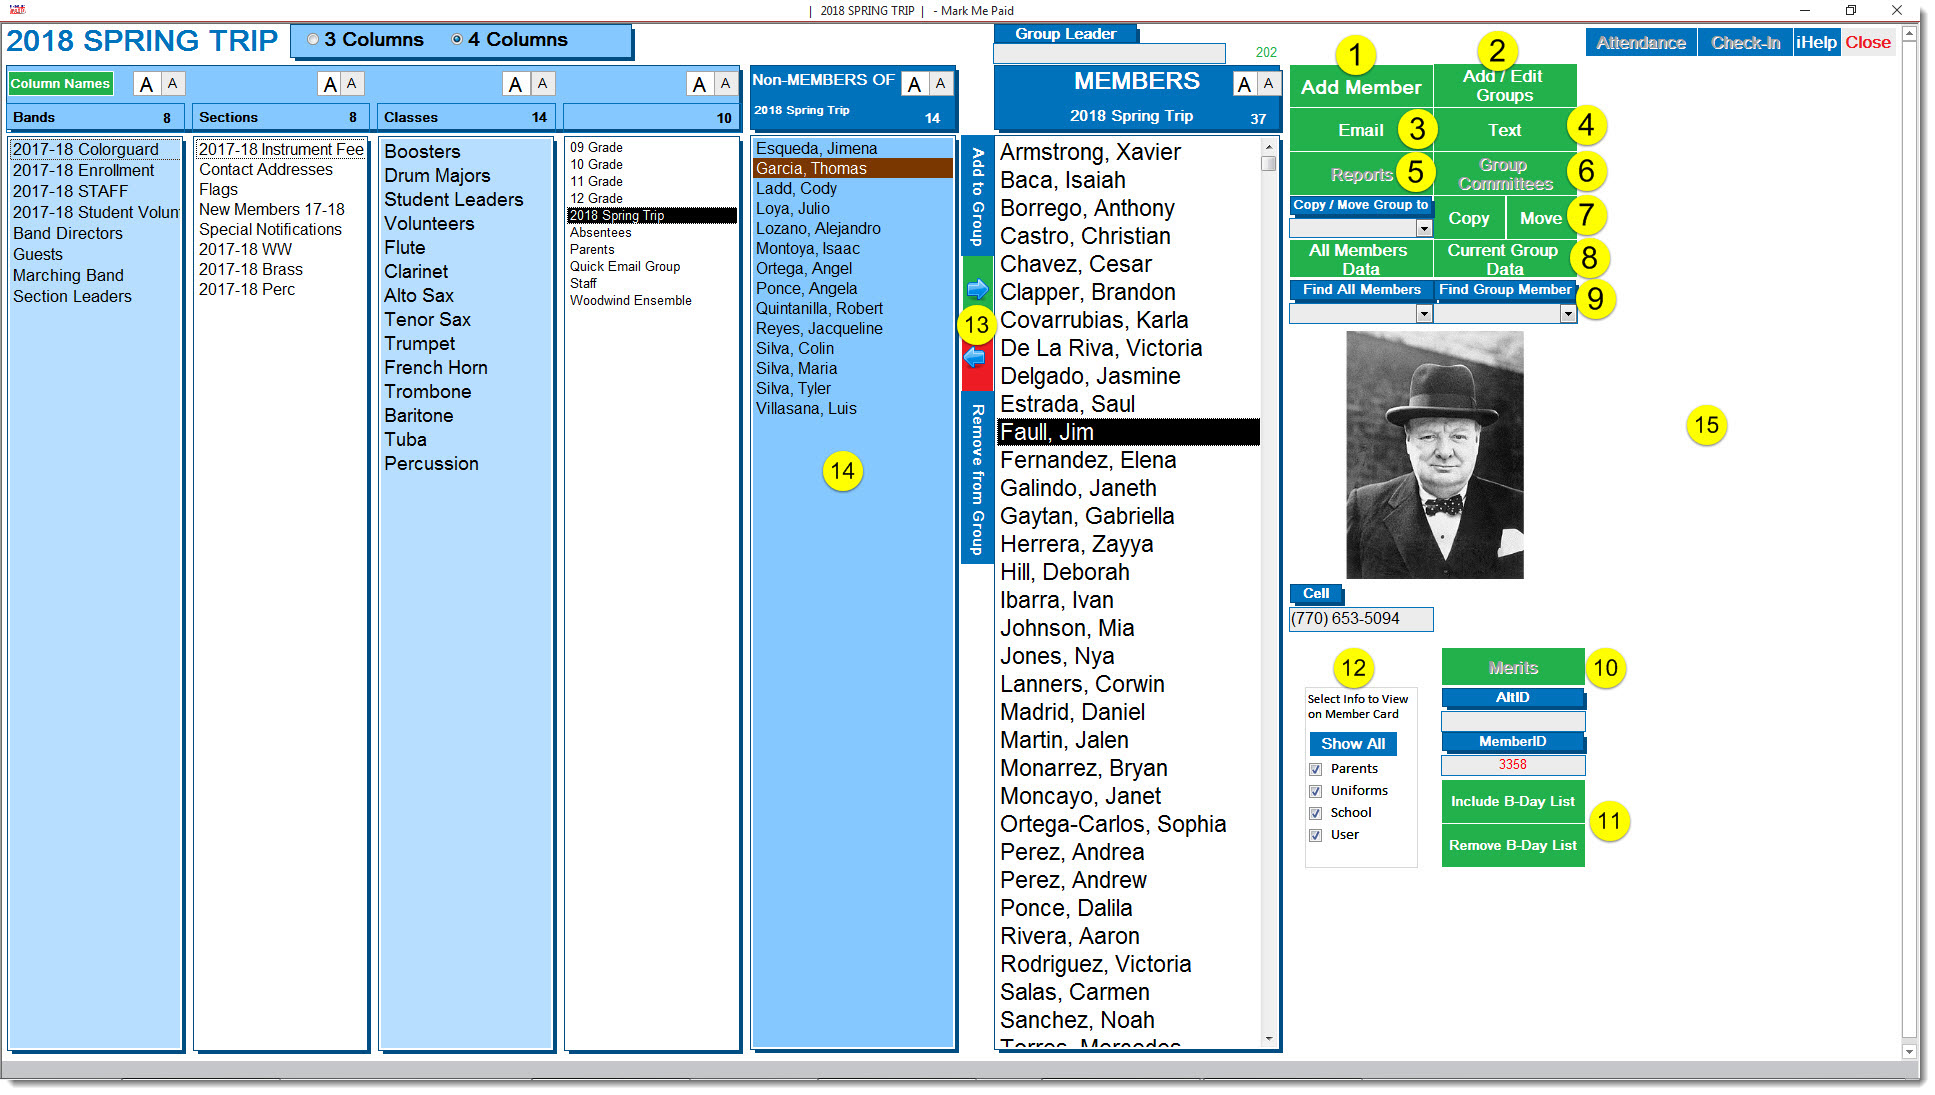
Move or Copy Members of this group to another Group
Group Data Sheets
Find Members
Merits
Include in Birthday List on Main Menu
Select which groups of info to show on Member Cards
Add Member
Select a group (new member will be added to this group)
Click Add Member
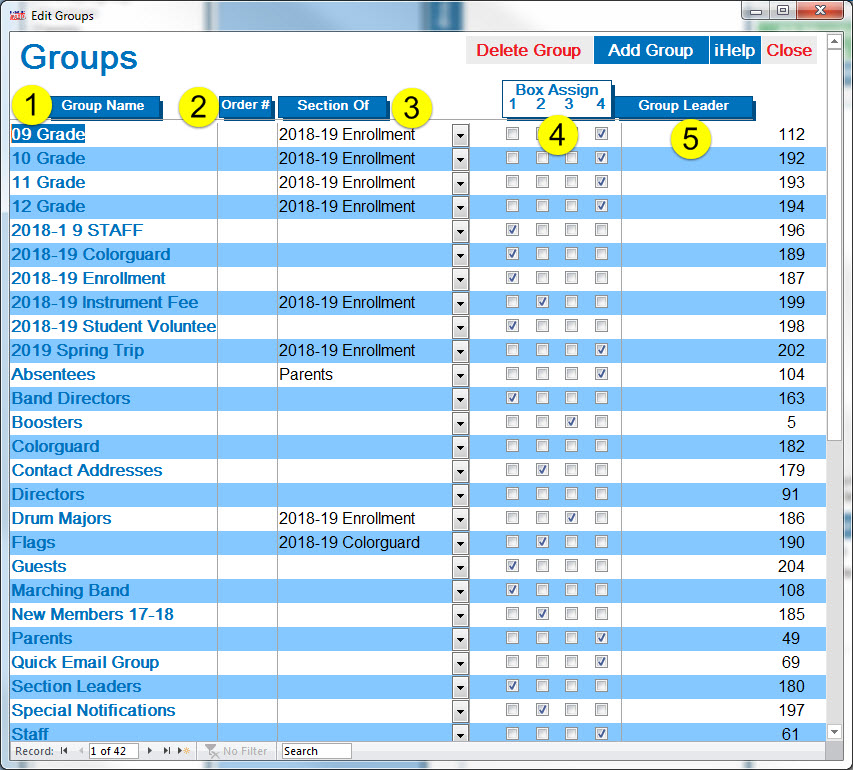
Add/Edit Groups
Edit Groups (New, Delete, Rename, Change Groups Box, Order, etc.)
Assign a number in Order# (default order is alphabetical) Best to start with the Box # (1, 1.1, 1.2, etc.)
Assign Section Of (only used for roll keeping – SATB. Trumpets, Trombones, etc.)
Assign one of the 4 boxes to display group name
Add Group Leader name here
To delete, click the group name and then click Delete
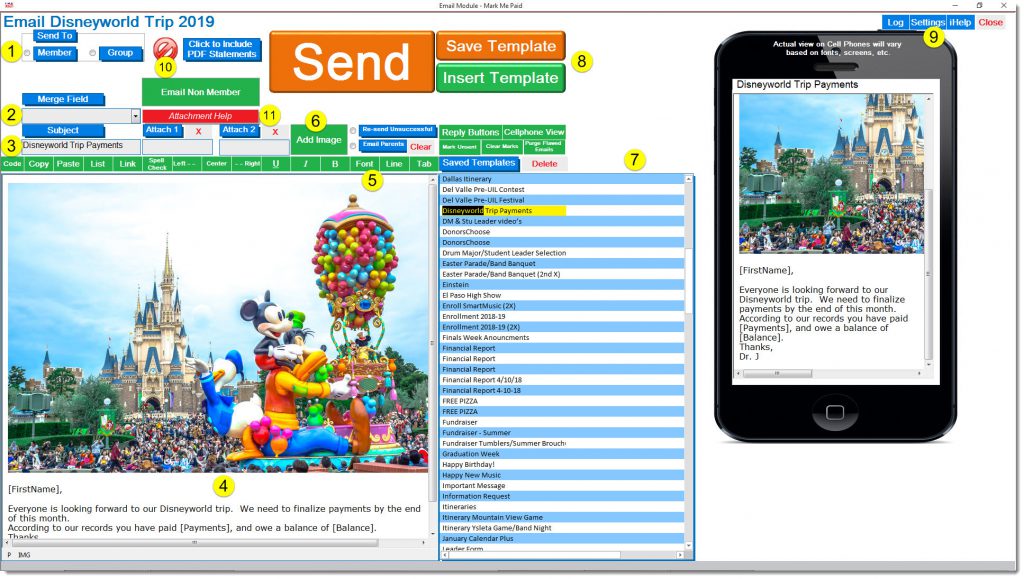
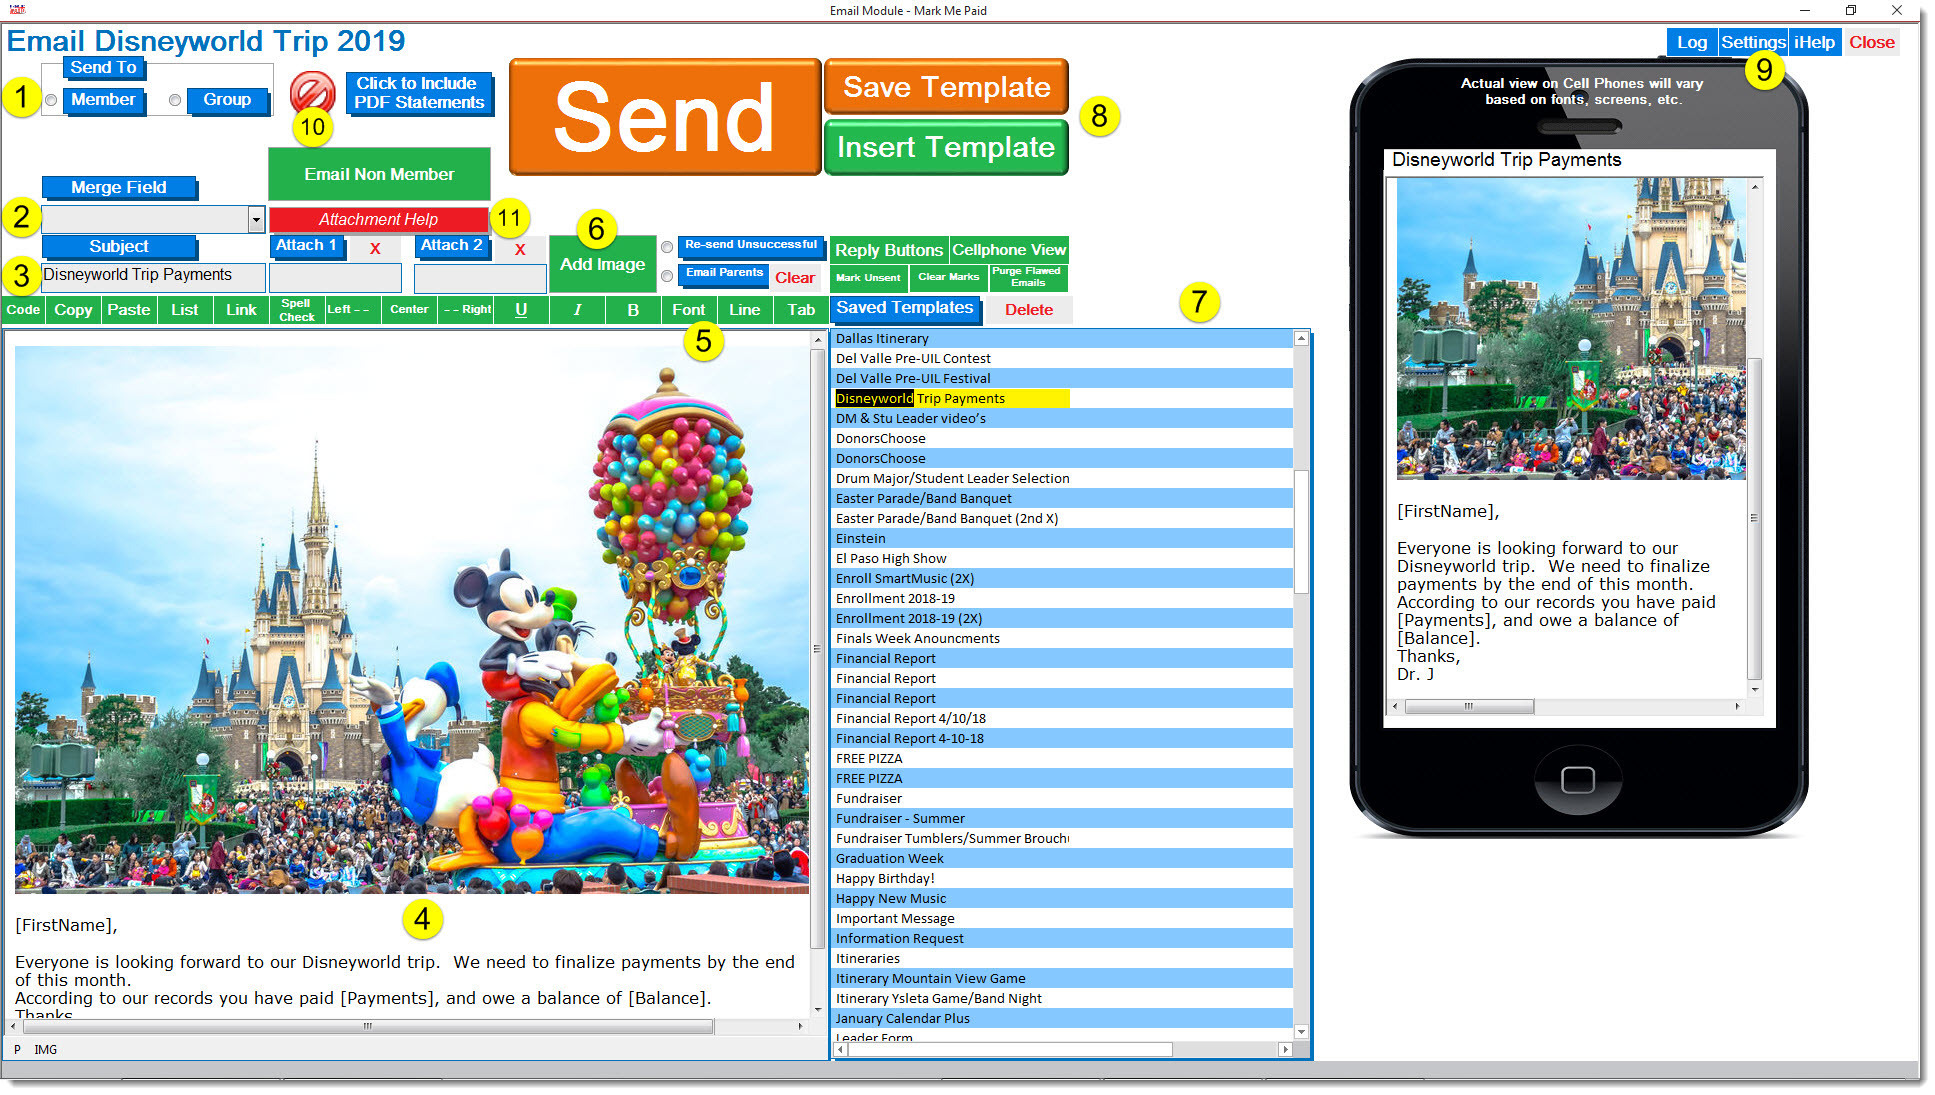
Email Group
Mark Me Paid Email Form It is imperative that your Email Credentials be entered on the Settings form. We do not use Outlook, but the settings for your outgoing email are identical.
Opens the Email form with this Account in the “To: box”
Merges First Name, Roommate, Personal Note, Payments, Balance and up to 5 Documents
Email must have a subject
Enter email message in rich text format
Change colors, fonts, size, etc.
Upload images
Use saved Email Templates
Save current Email
Go to email Setup page
Attach all PDF Statements for Account Members
Attach additional docs
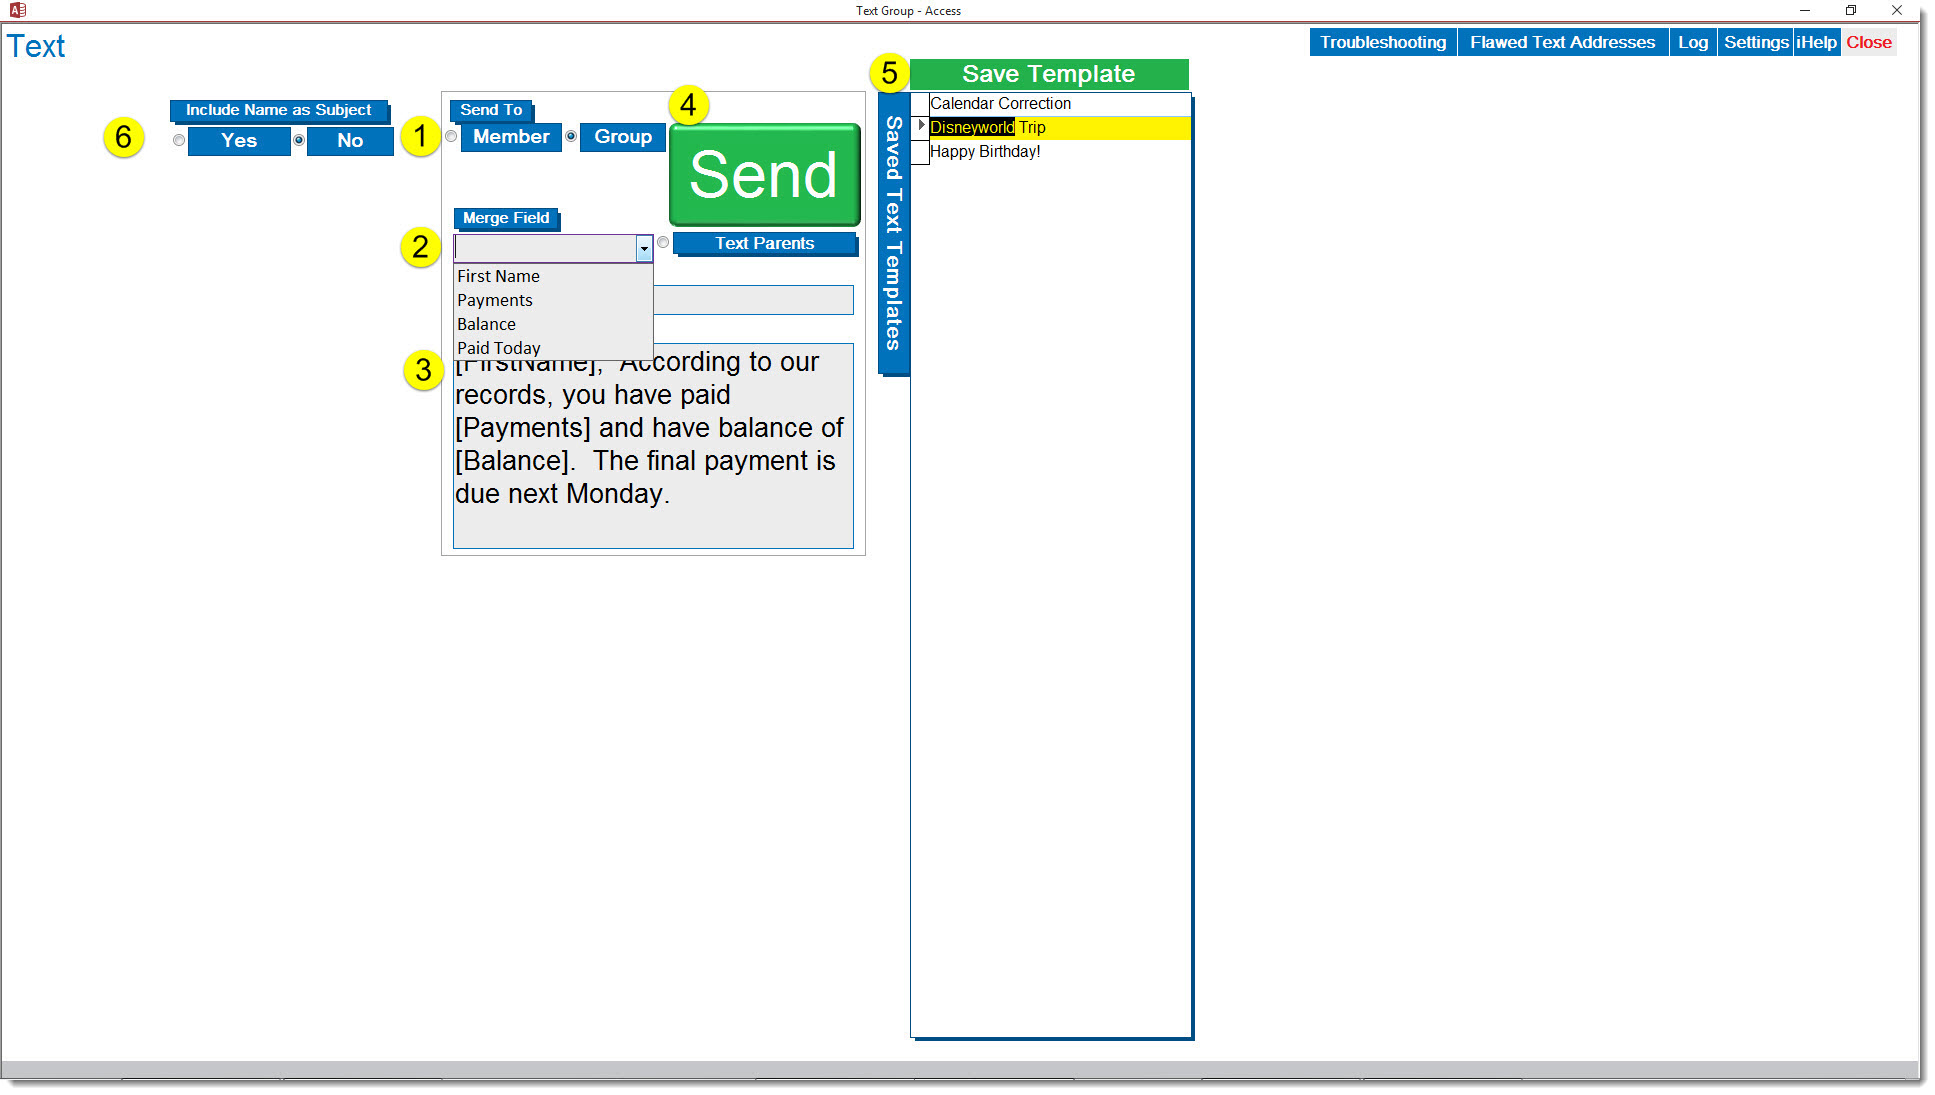
Text Group Opens the Text form with this group in the To: box Each person in this group that has a phone email address can receive a text message On Member Card, after entering the Cell #, Right Click for Cell Provider box opens a list of Cell Providers, where you double click the appropriate company
Select Member or Group
Select Merge field
Enter Message (up to 160 characters
Send Message
Save current Text Message as a template for later use. Double click a template to re-use it
Include name in reply message (without this, you will only see their cellphone info.)
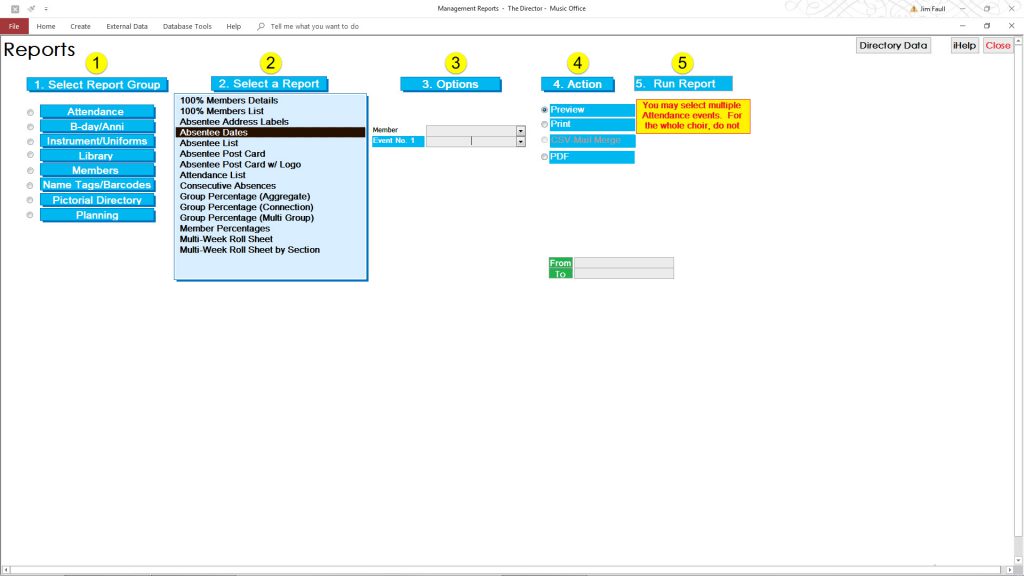
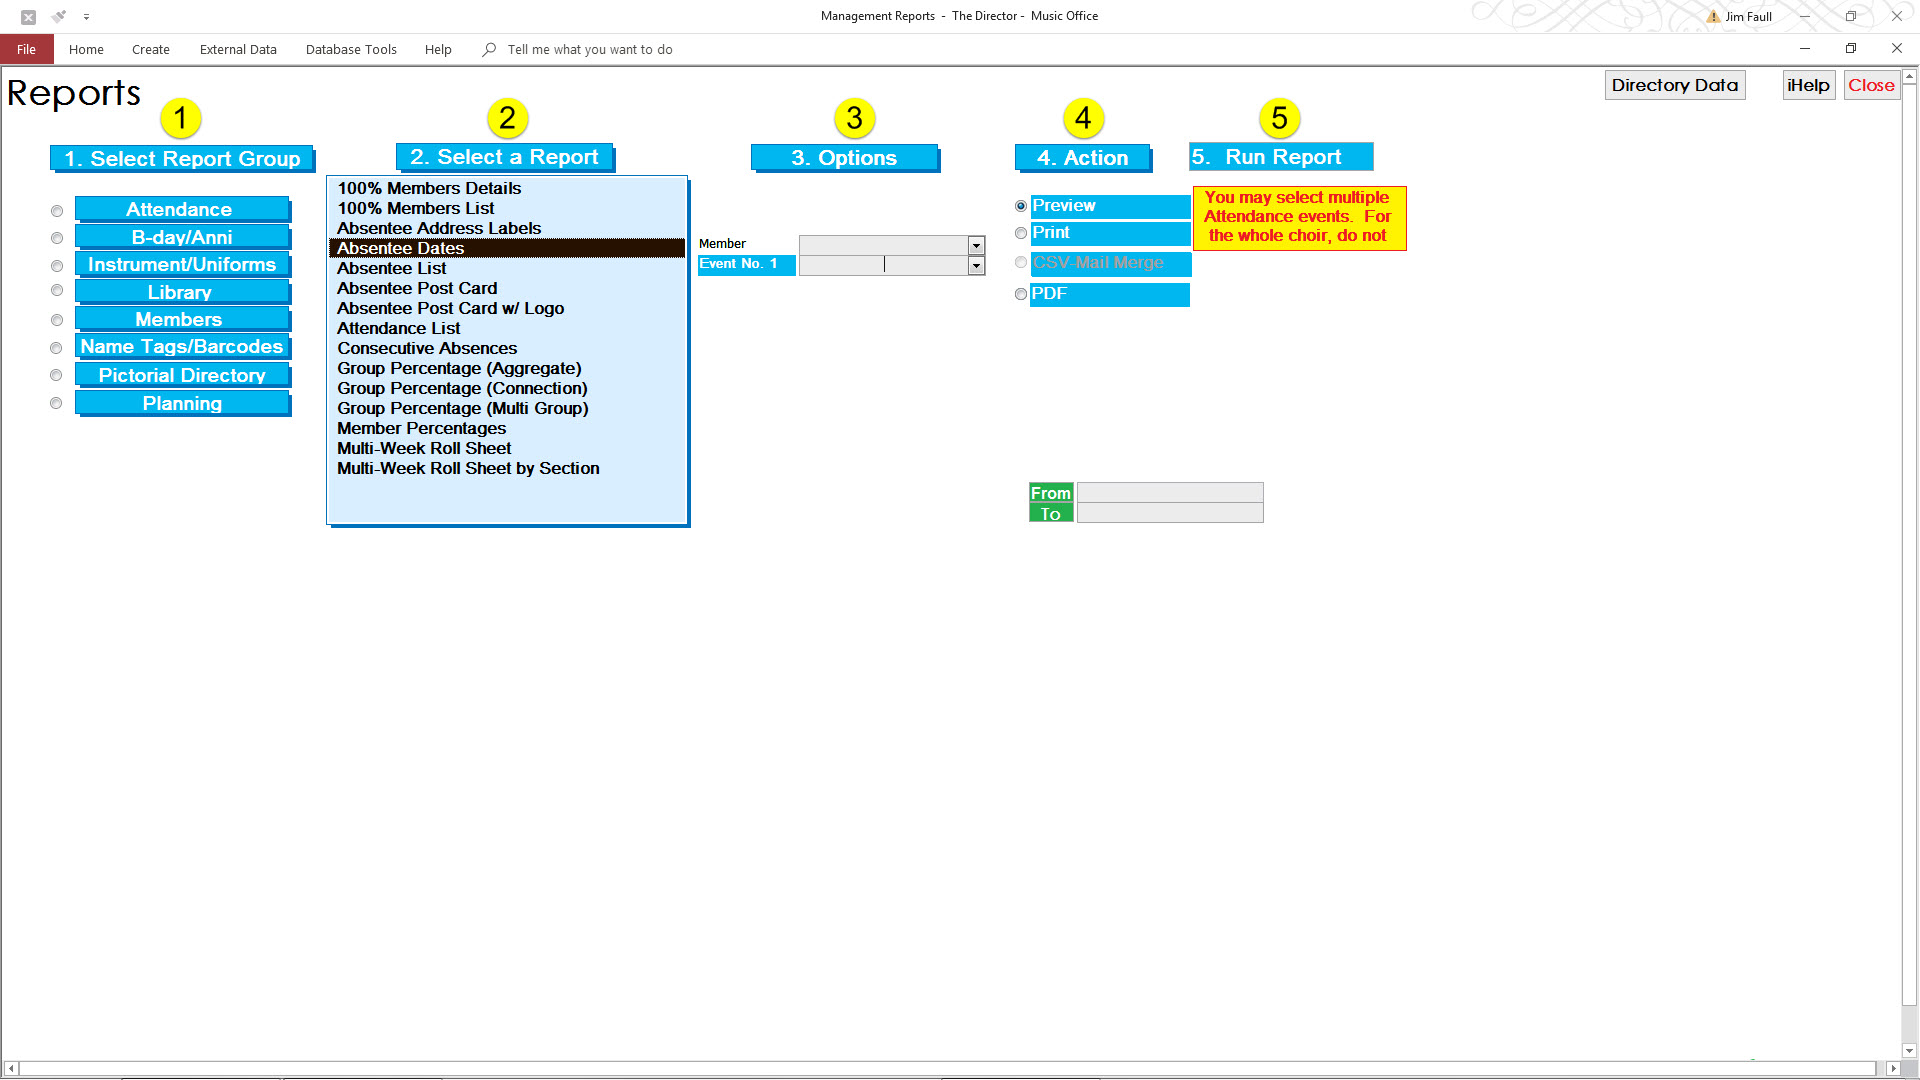
Reports
Select the Report Group
Select the Report
Select Options
Select Action
Run Report
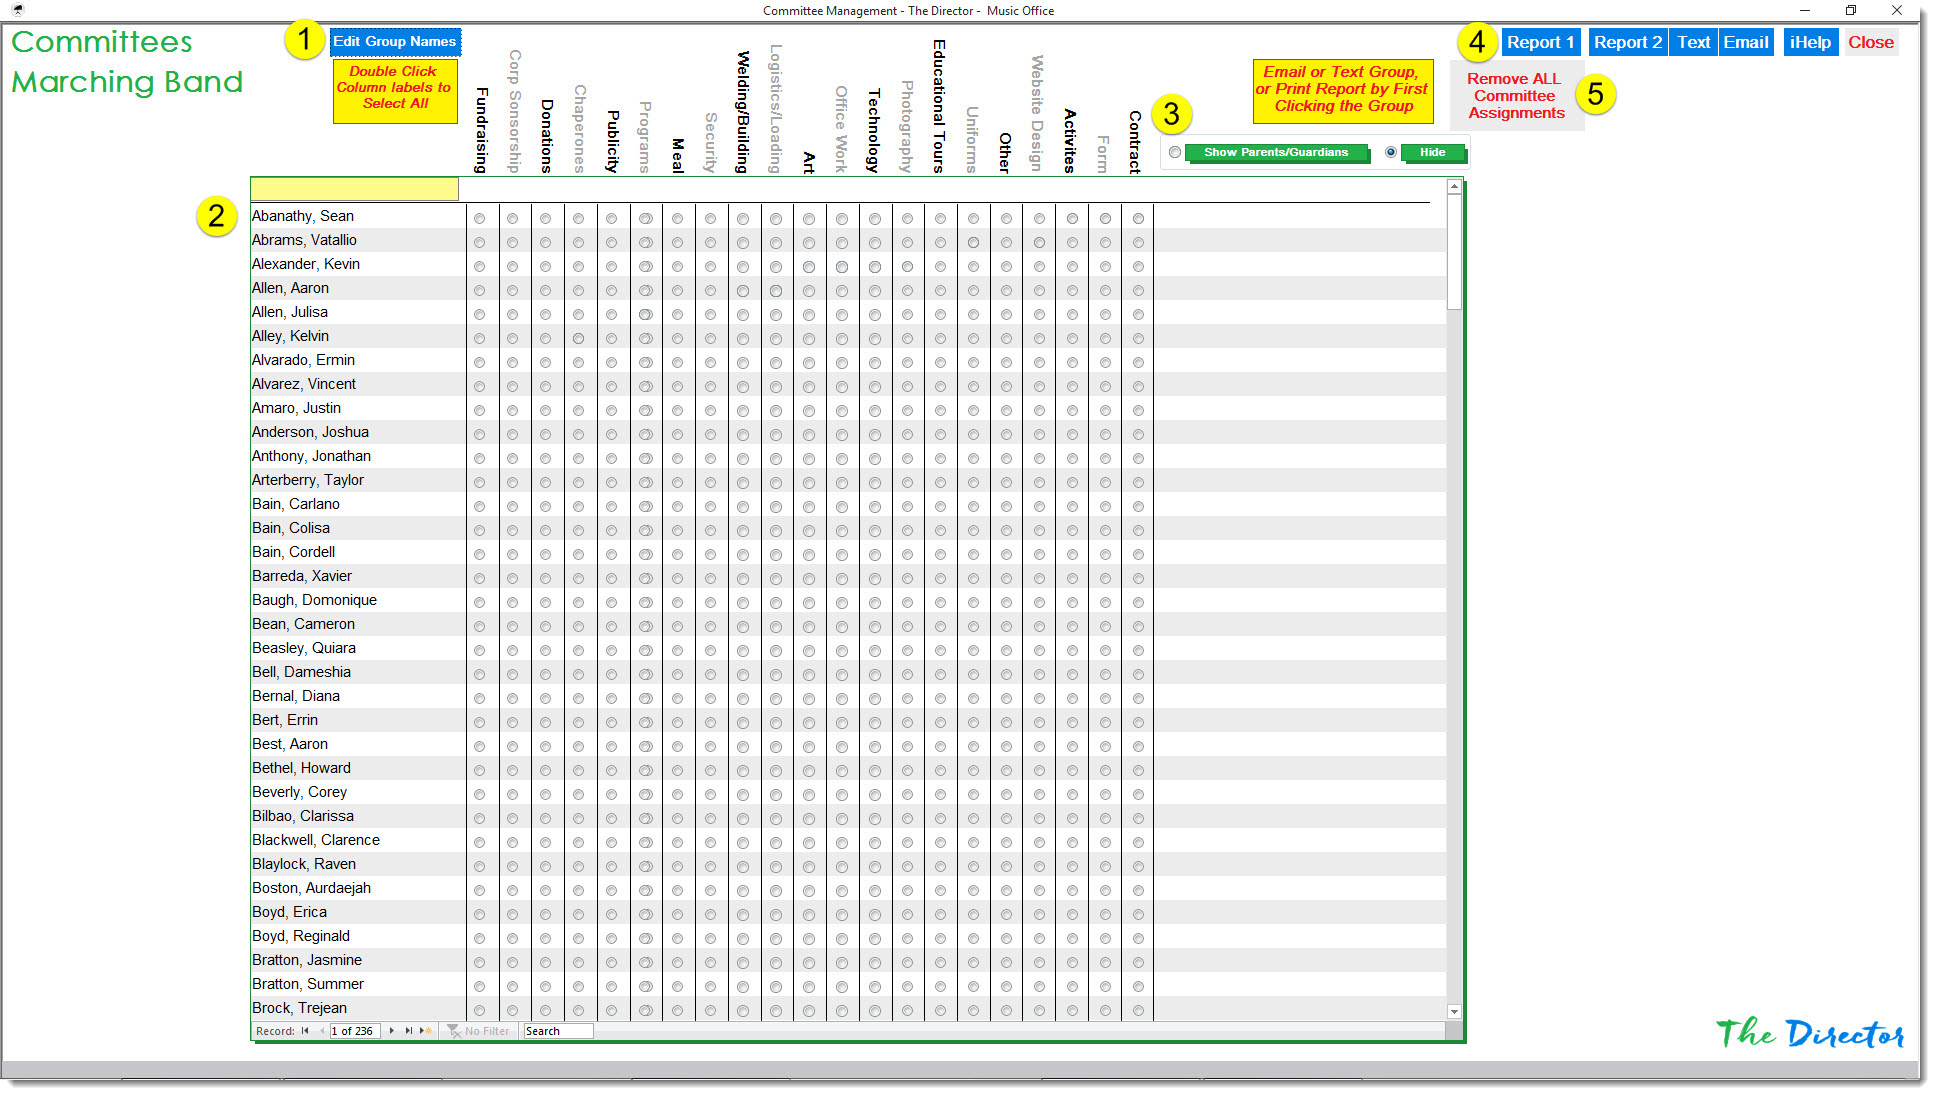
Committee Assign
Edit Group Names to rename the 21 groups or committees
Select any committee for this member by clicking the radio button across from names
Show or Hide Parents
Report 1 list all members and shows their committee assignments – Report 2 list all members of selected committee
Remove ALL Committee assignments
Email or Text a Committee
Select group to Email or Text by clicking committee name
Click member name reveals a Delete trash can
Use the large Trashcan to the right to Remove All Committee Assignments
Group Data
Data sheet form for selected group
Columns can be re-sorted, re-sized, and moved
Pressing Ctrl-“ (Ctrl-quotation mark) copies the contents of the field above current field. This is useful in duplicating addresses, cities, states, zips, etc. Other Microsoft shortcuts work here as well (Ctrl-C = copy; Ctrl-V= paste; Ctrl-X = cut; Ctrl-Z = undo)
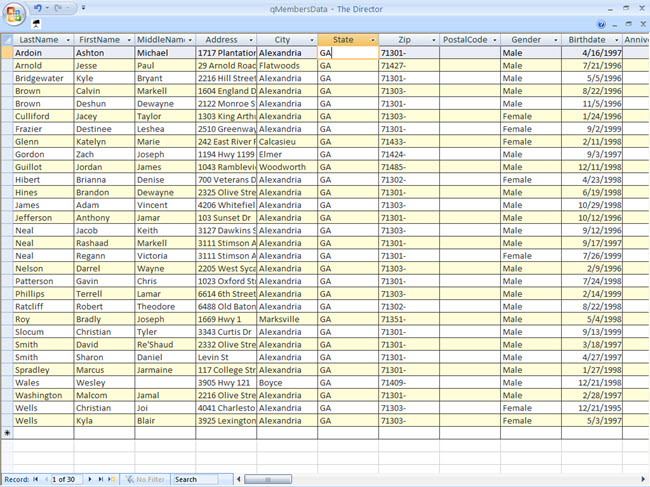
Data Sheet View
Data sheet form for all members
Columns can be re-sorted, re-sized, and moved
Pressing Ctrl-“ (Ctrl-quotation mark) copies the contents of the field above current field. This is useful in duplicating addresses, cities, states, zips, etc. Other Microsoft shortcuts work here as well (Ctrl-C = copy; Ctrl-V= paste; Ctrl-X = cut; Ctrl-Z = undo)
Member Info Card
To locate a member from the Member Groups form, click in the current group list and hold down the first letter of the person’s last name until that name appears. Then, double-click the member’s name
or, type the last name in the Find Member box
Member Facts
Create only one member card per member
Members can be in multiple groups
All Member data can be exported as a mail merge file (CSV)
Multiple Membership Reports are available on the Reports Menu
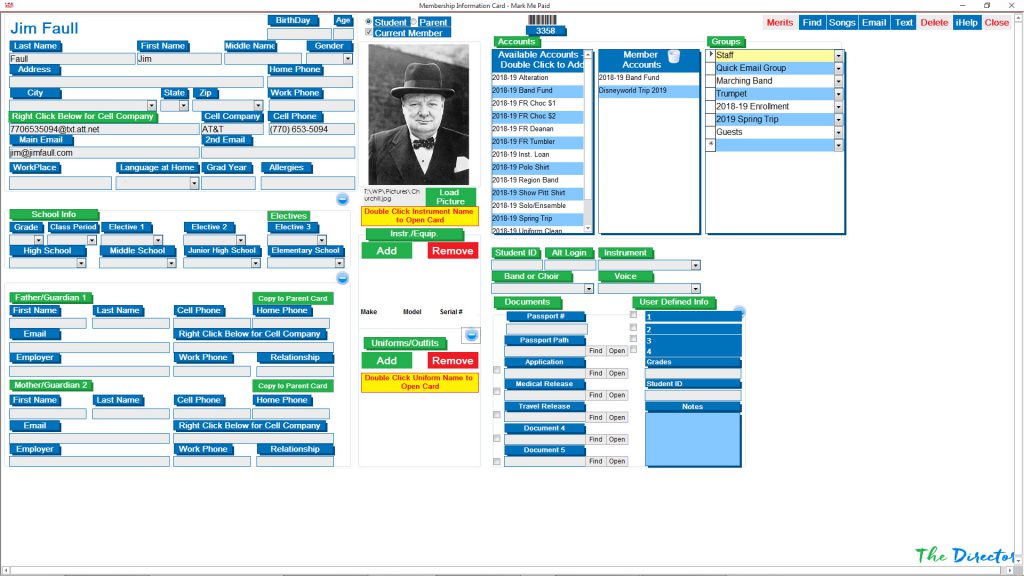
Member Card
The Member Card appears when you double-click a member name
Link a picture by clicking Load Picture
Assign groups by clicking the bottom drop arrow
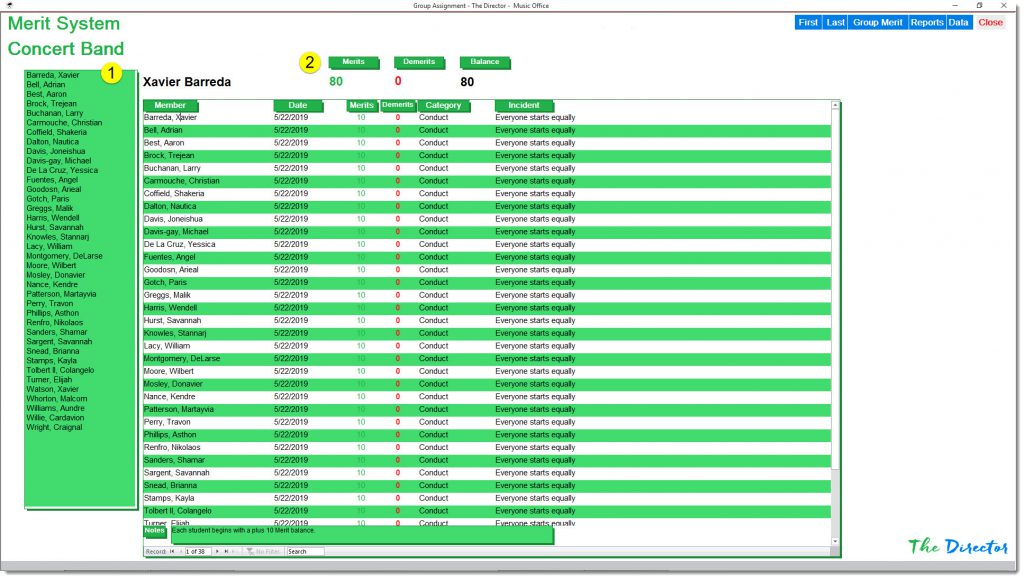
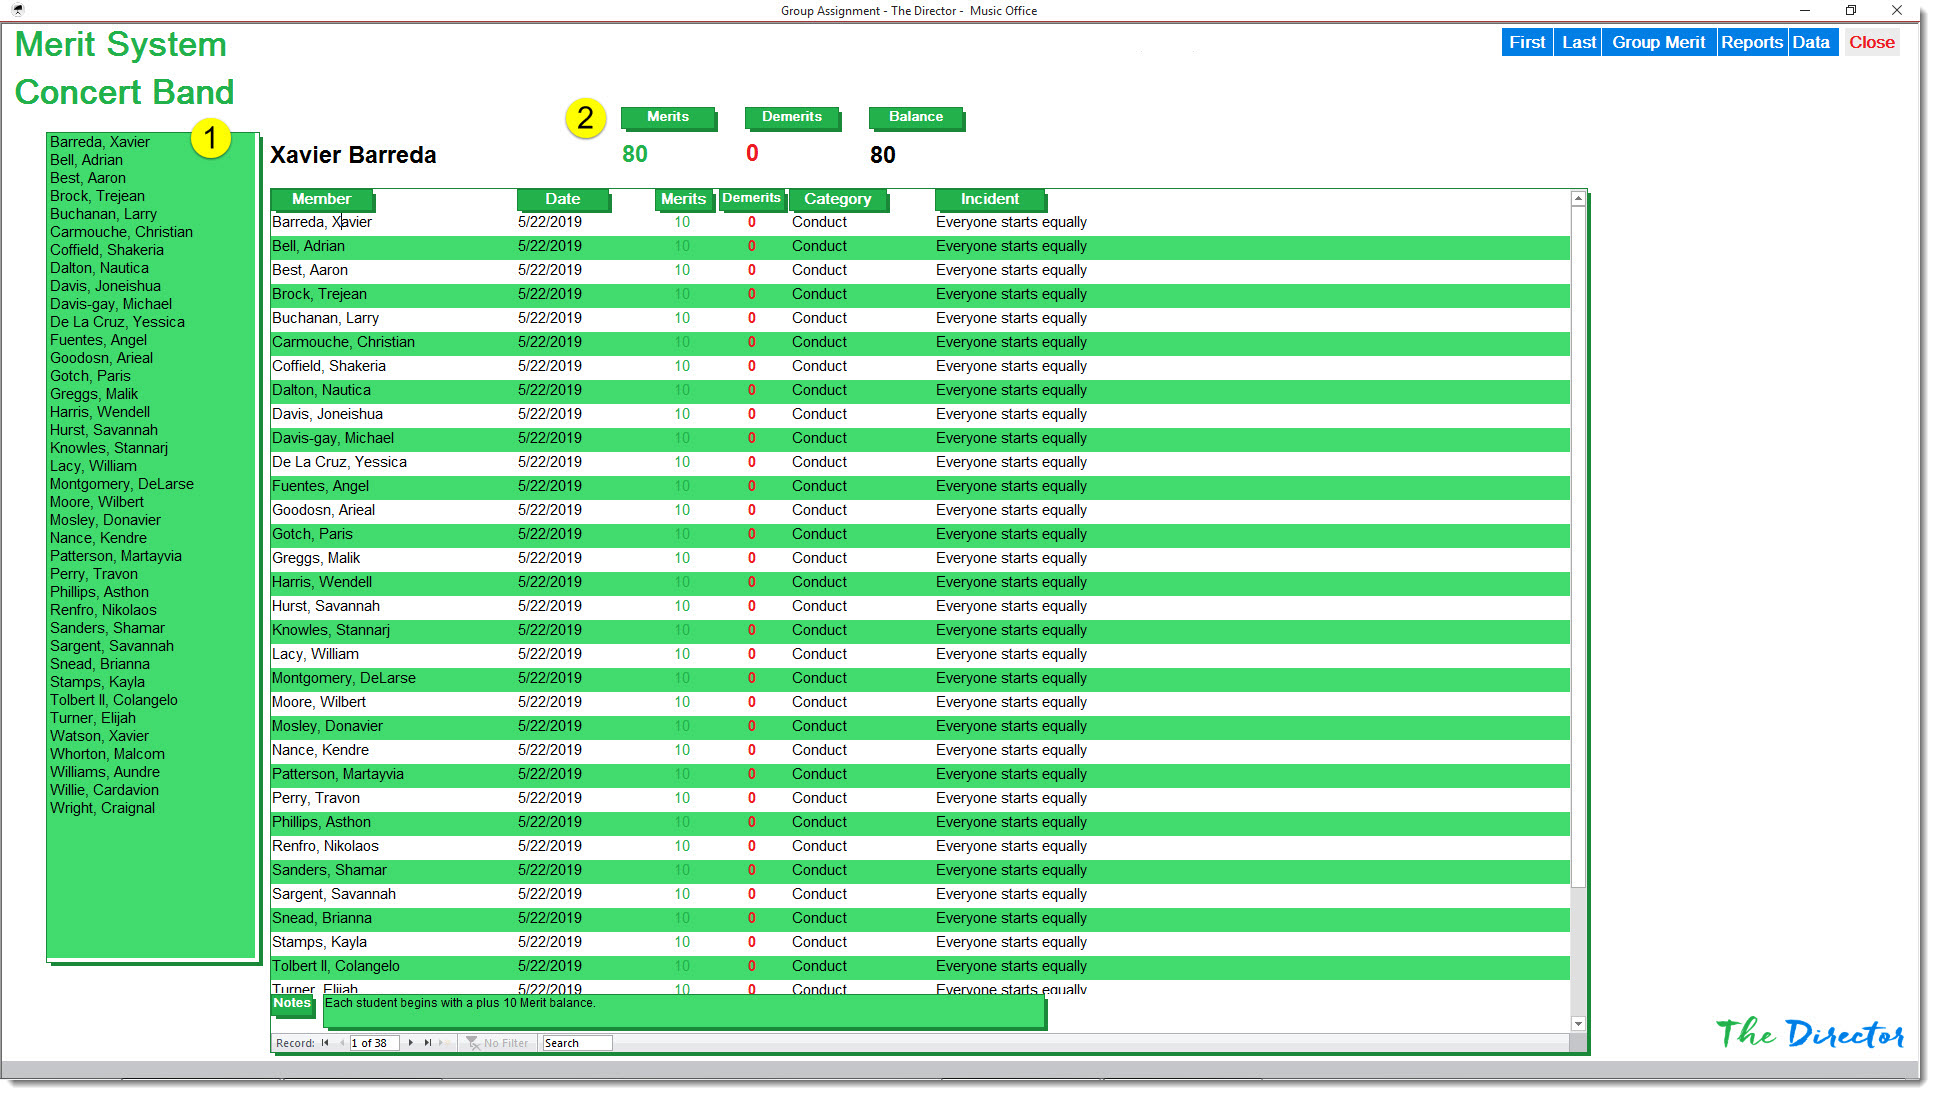
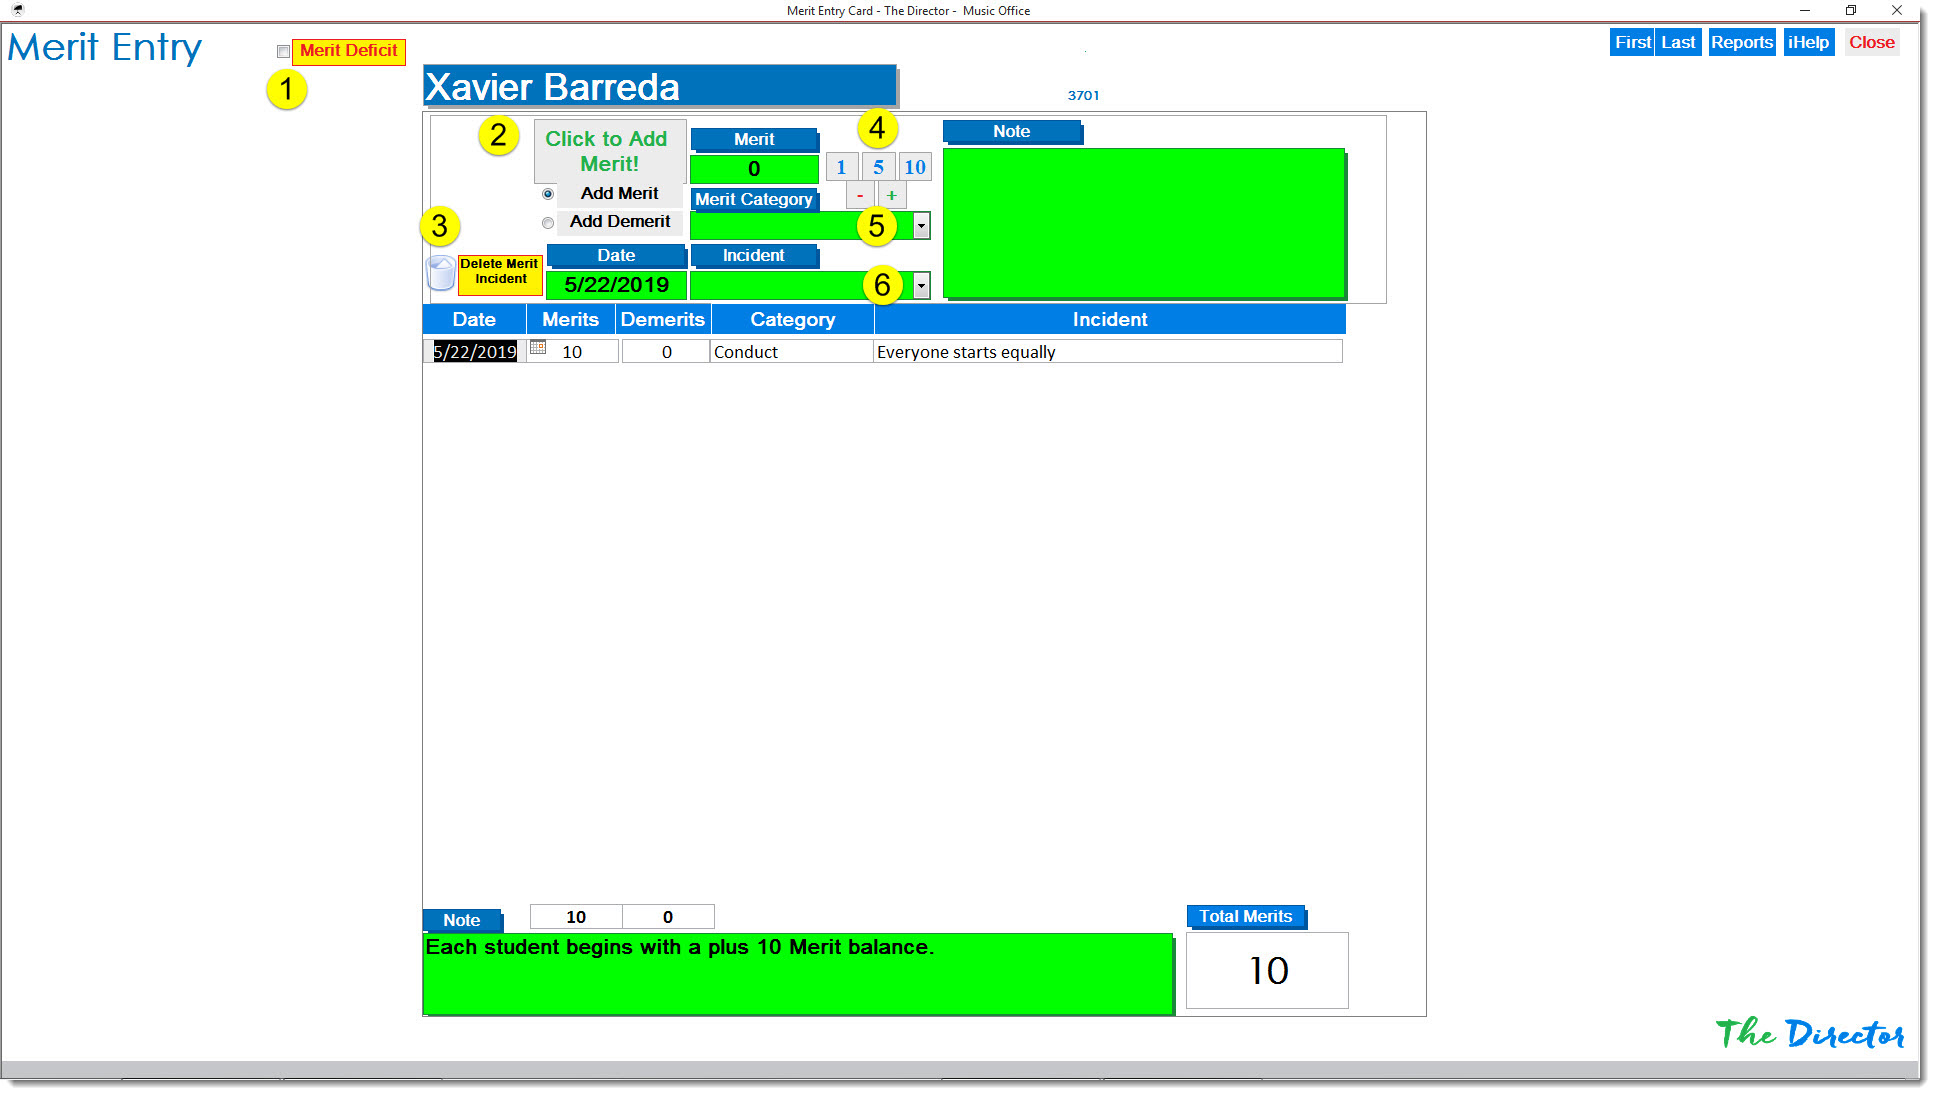
Merits
List of Names in this Group – Double Click a Name to Open their Merit Card
Selected Member’s Account
Merits
Shows if student is getting too many demerits
Select Merit or Demerit – Click to add completed transaction