The Director – iHelp Guest Nametags
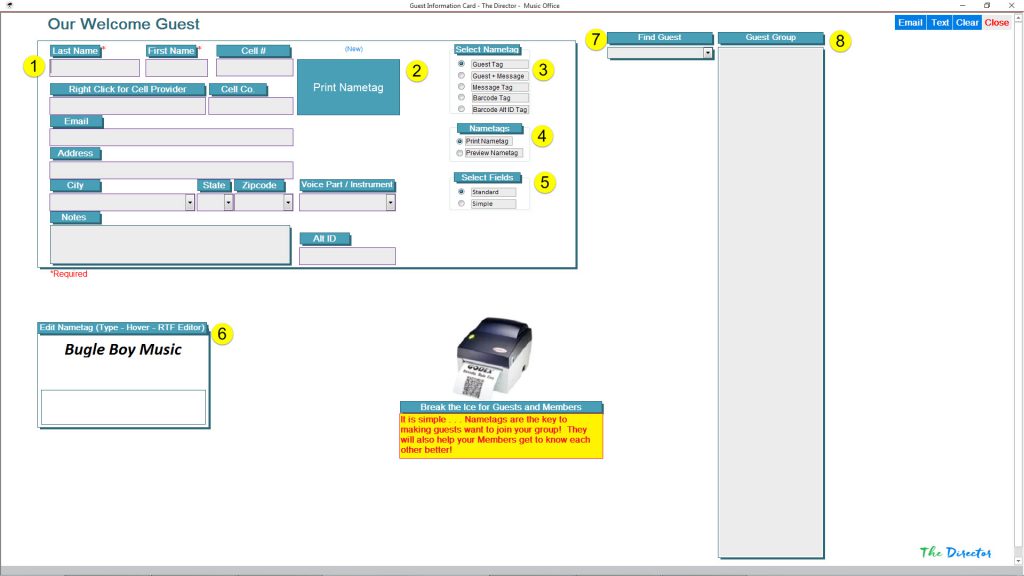
- Basic Guest Information
- Click to Print Nametag
- Select Nametag to Print
- Print or Preview Nametag
- Select to display all fields or just the basics
- Edit Nametag layout
Guest Name tags
- Requires a GoDex DT4 Thermal Printer
- After Registering Guest, their info is entered into the Membership database
- Members of this group appear in the right window.
- You can Text or Email Guests after they are registered
Select Nametag (4 choices)
- Guest Tag – Print an identifying nametag for guest
- Guest and Message – Print nametag and a message tag for the guest (turn in this coupon for a free choir CD, or such)
- Message Tag – Print only additional message tags
- Barcode Tag – Print a barcode tag that can be used to check guest in until they secure the QR Check-In app (requires a D2 barcode scanner)
Print/Preview Nametags
- Print nametag
- Preview nametag (without the GoDex DT4 printer installed, this feature will be less than satisfactory)
Select Fields
- Standard requires more time to fill out
- Simple collects just name, cell and email address
Edit Nametag
- Change the banner wording and font
- Block the banner text and rollover the selected text to edit
- Though you can change the color, that is un-necessary with your black and white thermal printer (no ink)
- You can also change the font size for the name
Print a Barcode for a Member
- Some members may not have a smart phone
- Type name in the Find Member box and select member
- Click Print Nametag
