Create and Edit the App
App Info
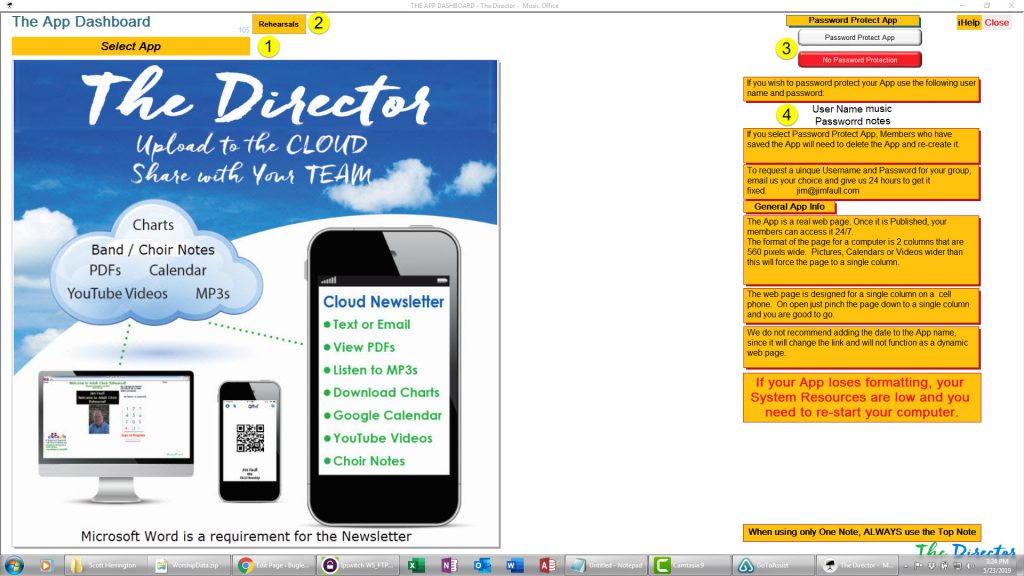
- The App is an actual Web page with a specific URL (address)
- When you edit the City, State and Organization name, you are naming the page
- Before the Newsletter is ready to publish, you can view it in your browser
- When you select Email or Text Link, you are publishing the page to the internet
- Since the link is unique based on your City, State and Organization, you could create a template in Email or Text that better identifies that a trusted source is sending the link
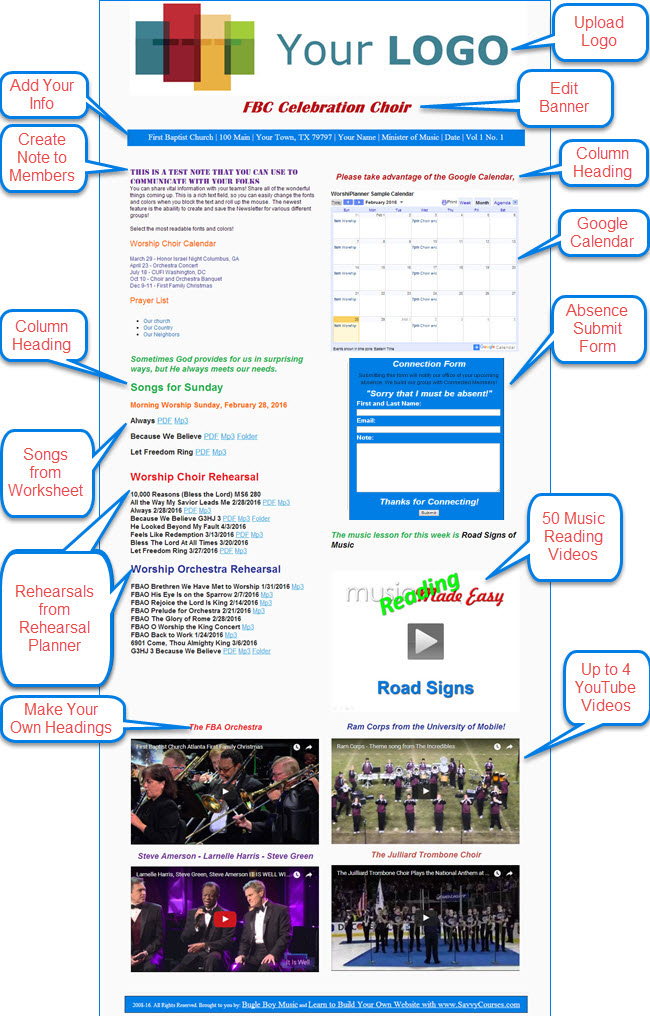
- Because the page is quickly modified by your selections, you will want to adjust the columns to better balance the page
- Songs that have Dropbox links will show the PDF and/or MP3 link text next to them
- Rehearsals created in the Rehearsals and Medleys form named with the word Rehearsal can be added to the App
- All songs selected for the upcoming week’s services will appear in the app. You can also select a date range of services.
Publishing the App
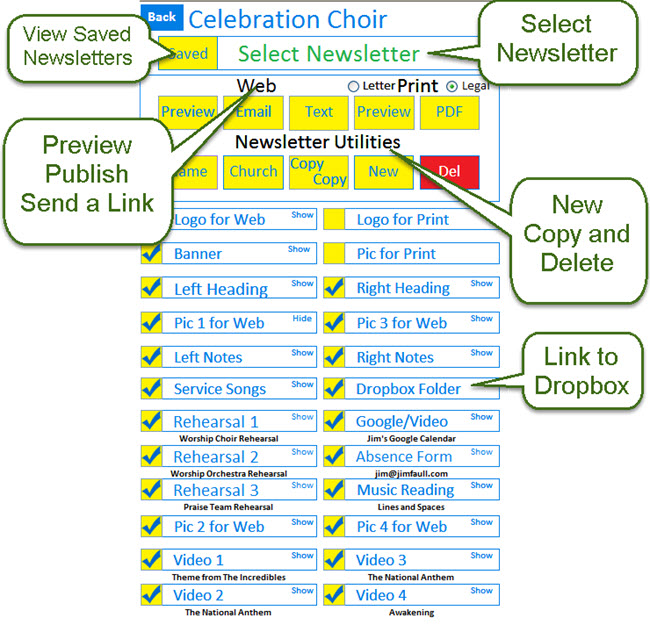
- Open App in your Browser to Preview. Good idea to do this!!
- This uploads the Newsletter to our FTP site and puts a link in your Email component. Once the initial link is established, the link will stay the same.
- This uploads the Newsletter and puts the link in a Text Message.
- This lets you Preview the print version page before it is printed.
- Creates a PDF file of the Newsletter.
- Choose Letter or Legal size paper for Print or PDF.
App Utilities
- Click to name the App. Best to have a unique name for Print Newsletters
- Click to add the Organization name.
- Click to Copy the current Appand then give it a unique name.
- Create a New App.
- Delete the current App.
Selecting the elements
Create Your Own Submit Forms
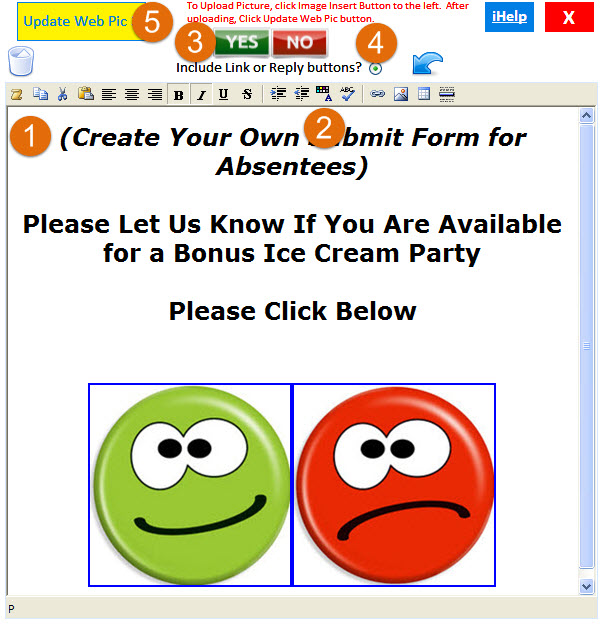
Create and Edit a Submit Form (Decide Which Pic to Use)
- Type You Message
- Click the Font button and select Font , Size, and Color
- Select Reply Buttons
- Click to Include Reply Button
- Click Update Web Pic
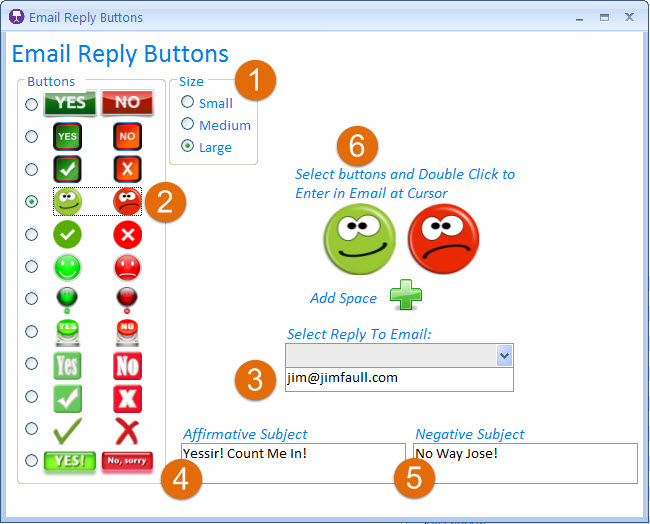
Create Your Own Email Reply Buttons
- Select Size – Large, Medium or Small
- Select Buttons – Currently 12 sets of choices
- Type Reply Address or Select from the drop list of members
- Edit Affirmative Subject
- Edit Negative Subject
- Double Click button Choice
Adding and Editing the Team Folder
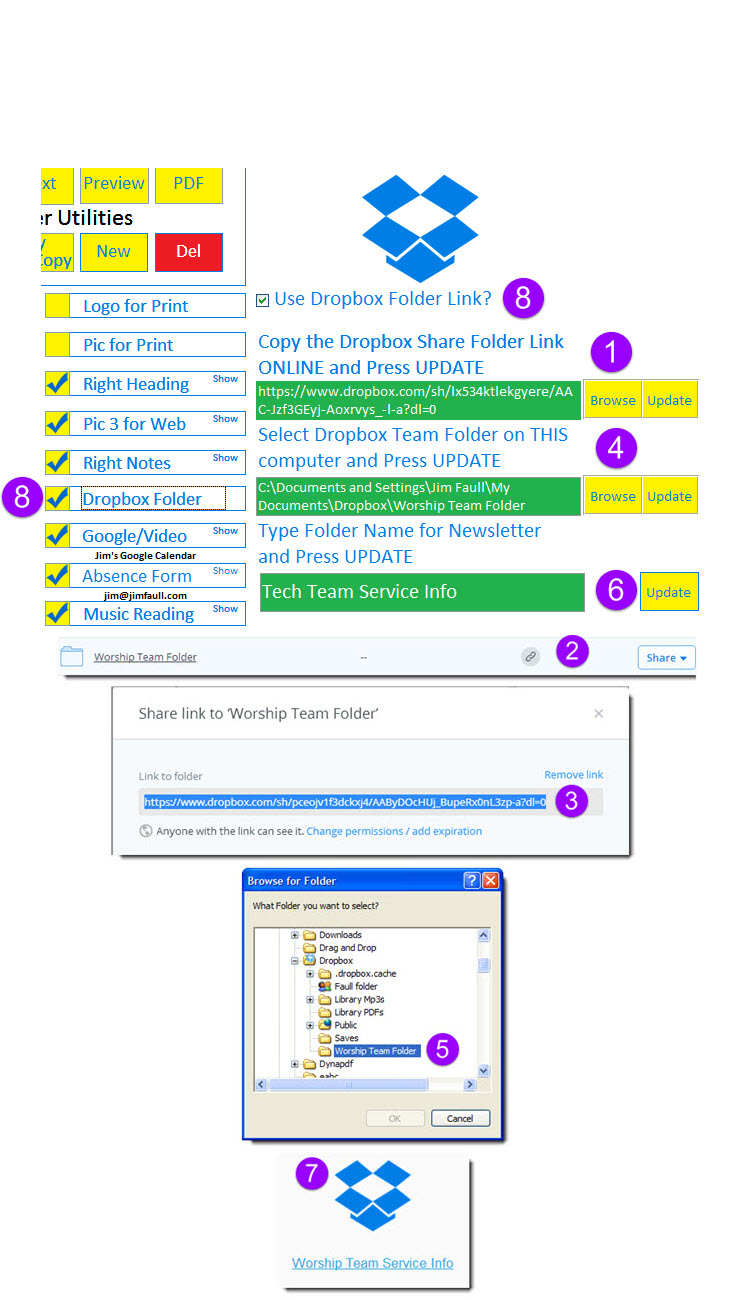
Create and Edit a Team Folder in Dropbox
- Browse to Dropbox and add a new folder (ie. Team Cloud Folder)
- Click the Share
- Copy Link to Folder (Ctrl-C) and Click UPDATE
- Browse to Dropbox Team Folder on THIS computer
- Select Folder and Click UPDATE
- Type the Folder Name and click ENTER
- When Selected, the Link to the Worship Team Folder appears on the App!
- Click to Use the Team Cloud Folder on the App. Files can be sent to this folder automatically from Dropbox.
Uploading and Editing the Logo or Picture
The process for using a logo or a picture for the web are similar.
1. Click the Upload button, browse for the file
2. Click the Update Logo button. This is a very important step!
3. Use the trash can to remove the logo from the editor.
Note: When you change the Logo or Picture, be sure to delete the former logo or Picture
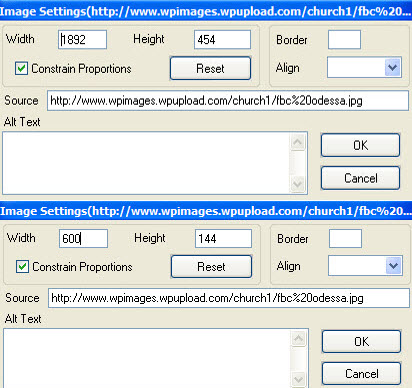
- Double click the image
- Set the width at 600 pixels
- Click the Update Logo or Picture button
Editing the Note
- Type desired text.
- Select text and Roll the mouse up to make the editing menu appear.
- Select fonts and sizes.
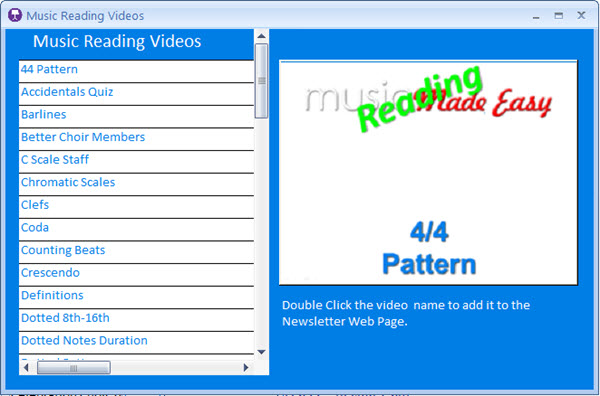
Selecting a Music Reading Video
- Click the Music Reading Videos button
- Scroll to the video for this week
- Double click the Title in the list on the left
- Enter the instructions in the Music Reading Video Header
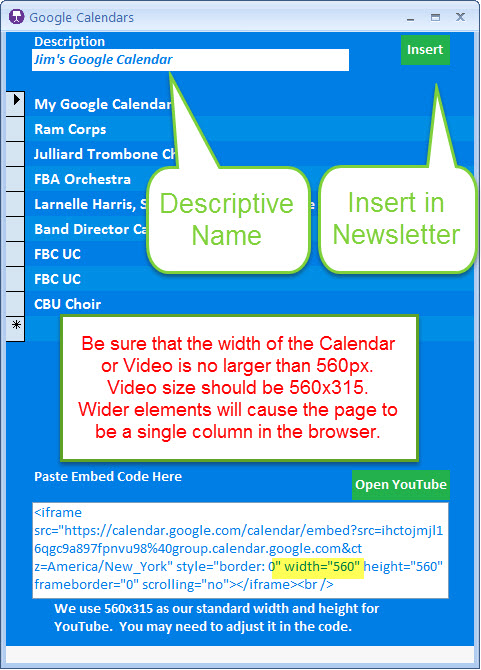
The Google Calendar/YouTube Video form
- Click the Google Calendar, or any of the 4 YouTube Video buttons
- Scroll to the video for this week
- Double click the Title in the list above or click the Insert button
- Be sure to make the width of the Calendar or Video at 560px or less.
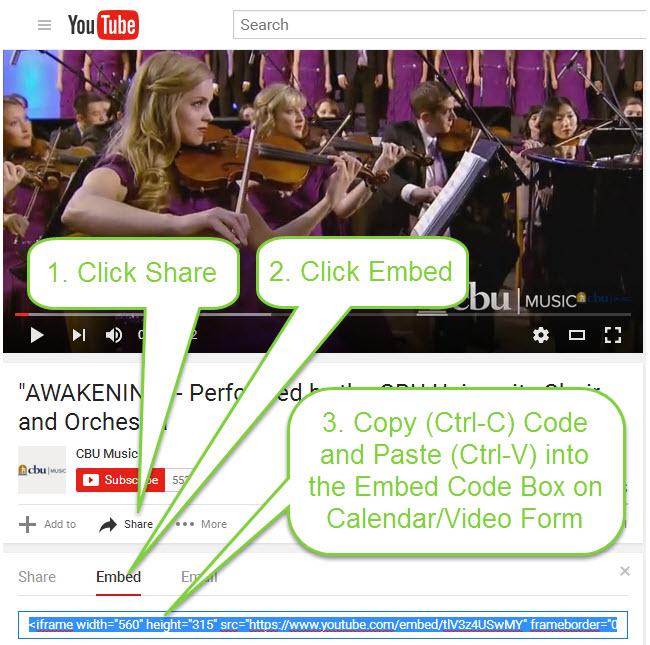
Embed YouTube Code
- Click Share on the YouTube Video
- Click Embed to reveal the embed code
- Cut and Paste the embed code into the Embed Code text box on the Google Calendar form.
Editing Banner and Headings
All Banners and Headings are edited by clicking the appropriate Blue button.
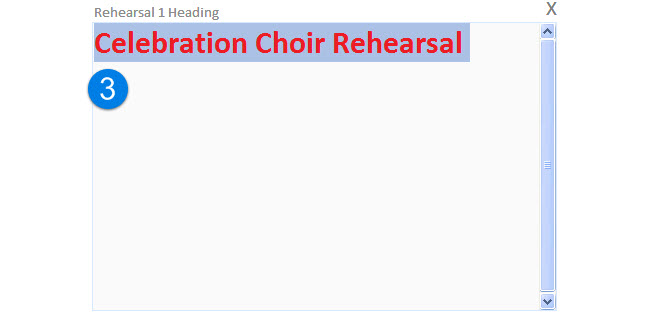
- These Headings are in RTF (Rich Text) format and are edited like the Note as described above.
- You can use these Headings to adjust your columns based on size of data by increasing or decreasing font size or adding Returns (Enter Key)
Adding Rehearsals to App
Add any rehearsal with the word Rehearsal in the title. Create the rehearsal in the Rehearsals and Medleys Module. All Songs with Dropbox Links will show a direct link to the song or a direct link to the containing Folder
- Click the Rehearsal button.
- Select Rehearsal.
- Edit Header
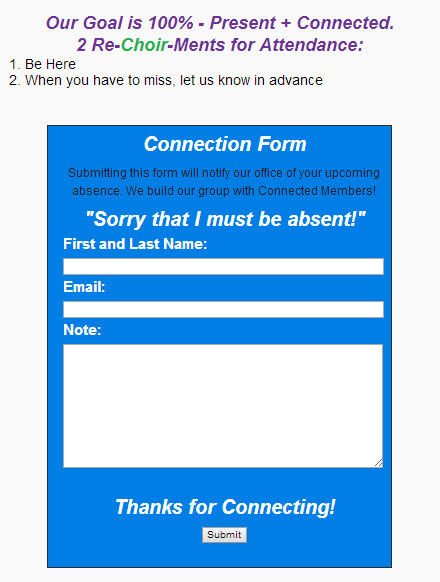
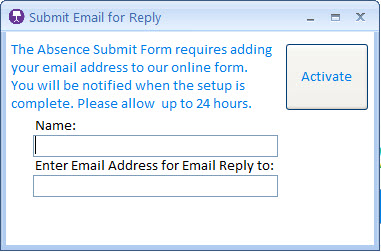
Absence Submit Form
The absence Form requires some setup on our part with your email info. Please allow up to 24 hours for this process.
Click the Absence Submit Form button in Newsletter Setup
- Put your name and the email address to receive the absence emails.
- Activate
- When members submit their reply, you receive an email.
Printing the App
Obviously, all of the web based interactive items do not belong on a print version. You will want to create a special print newsletter so you do not have to keep selecting and un-selecting elements to include. Since all every element is sized differently, you will need to adjust positions by adding or deleting lines.
- Copy an existing App and add the word Print (Marching Band 4 Print)
- Un-select web based elements (Videos, Calendar, Web Logo and Pic)
- Choose paper (Letter or Legal)
- After Preview, use the Headings or Notes to balance the page
- Print or Create PDF file
