EZ Check-In is a unique Attendance checking program that can be utilized by: Cell Phone app; Bar Codes on a card or label; Typing in a Member #; or even by scanning a finger.
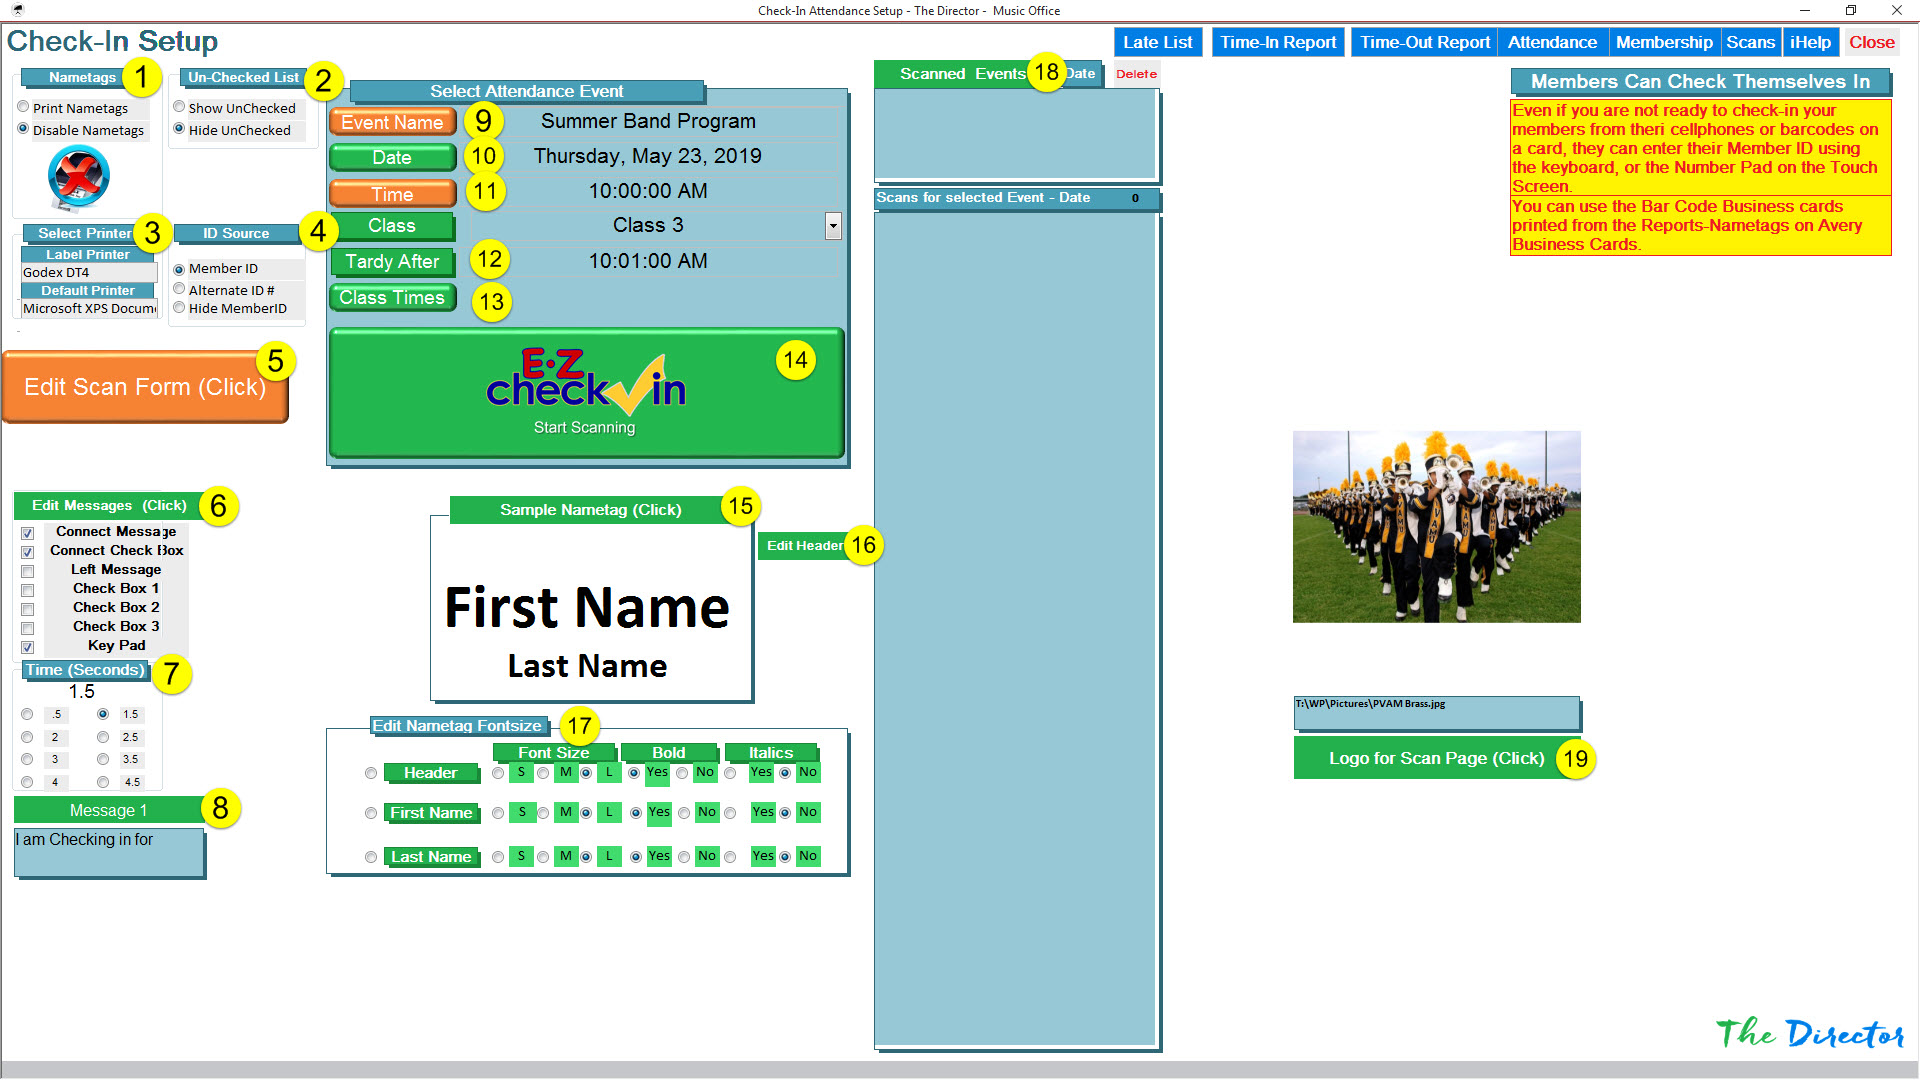
EZ Check-In Setup
Select Print Option for Nametags
Toggle to view list of no-checked-in members
Select Printer
Select The Director Member ID or an alternate Student Id (These #’s MUST be unique!)
Edit options for Scan Form
Edit and Select Messages for Scan Form
Set pause time for displaying name and picture
Toggle Message to Display
Select Event at the top
Select Date from Calendar
Select Class
View Tardy Time
Edit Class and Tardy Times
Click Start Scanning opens Scan Form
Edit Nametag layout
Edit the Nametag Header
Set Font Sizes for Nametag
View Scanned Events
Add Logo to Scan Form (Right Click Picture to Drag to Upload box)
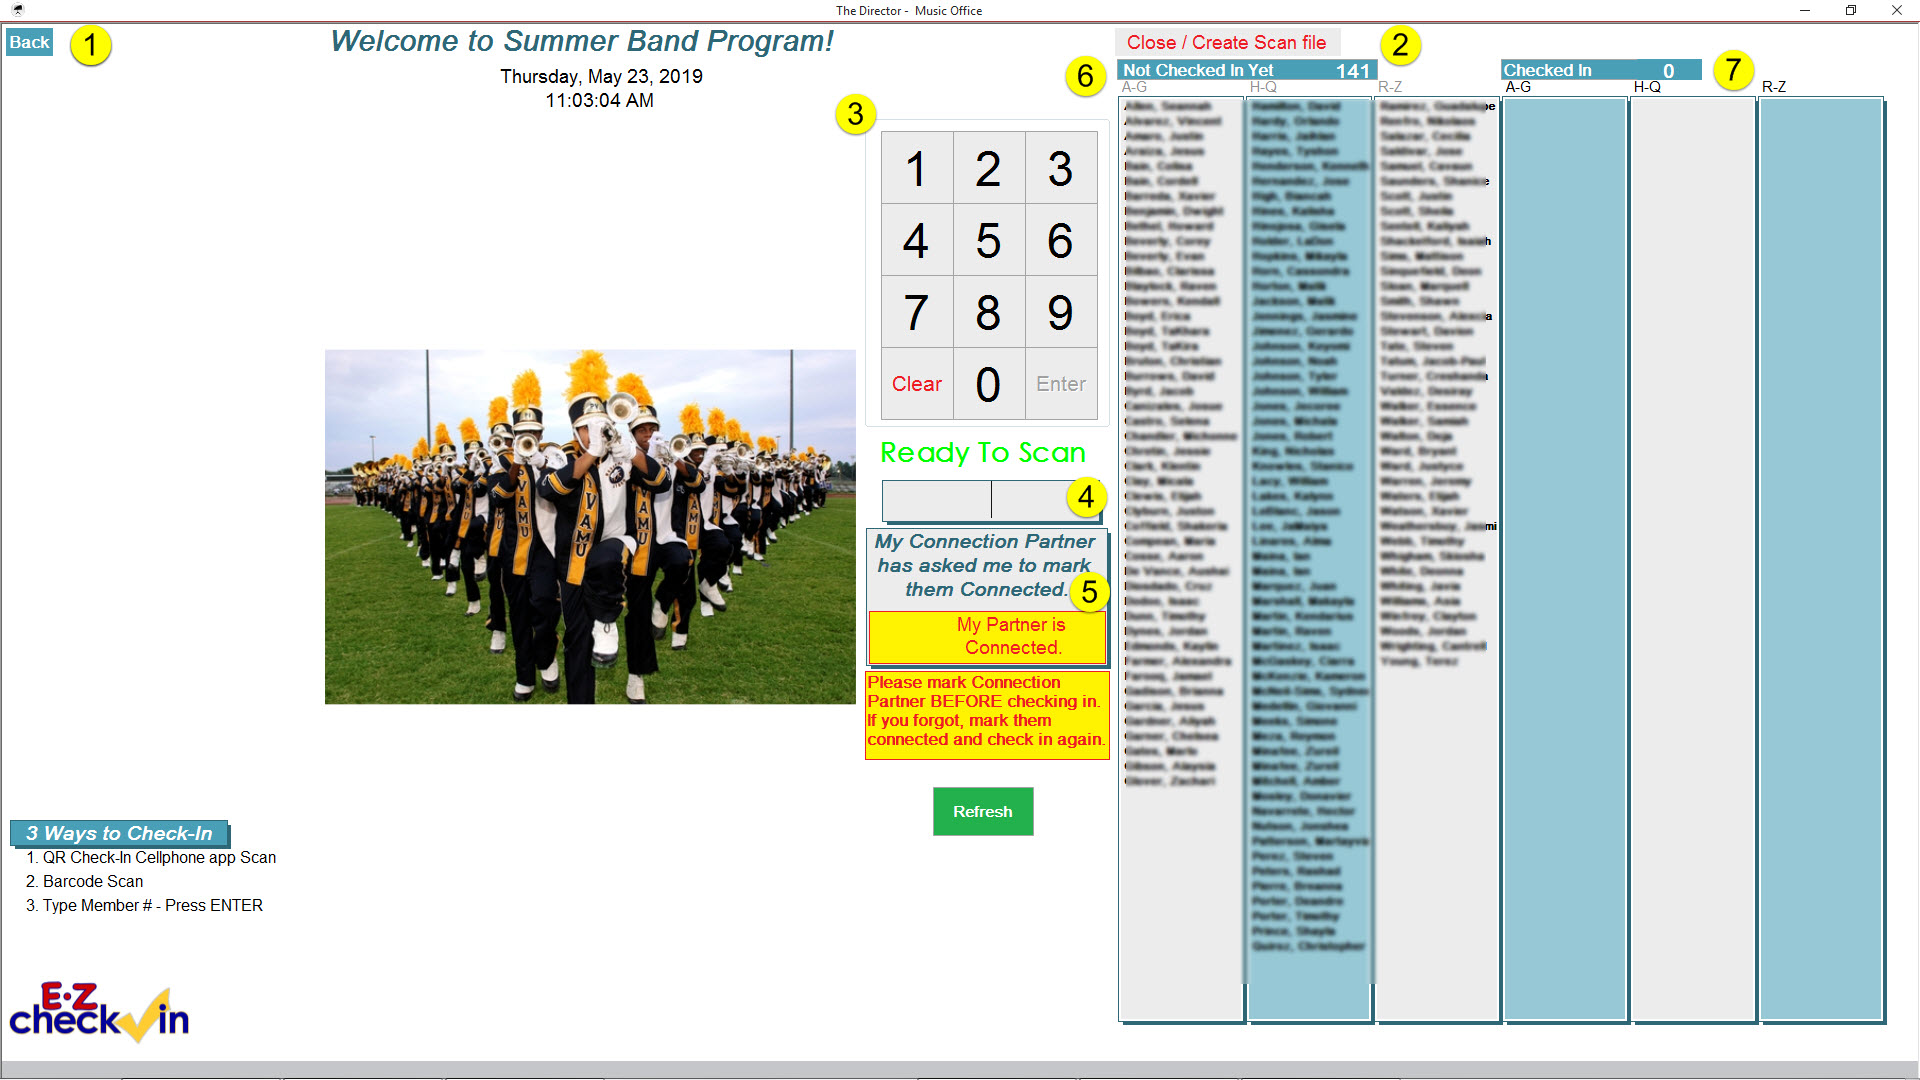
EZ Check-In Scan Form
Back button closes Scan Form without creating Excel file with Scans
Close Scan Form and Create the Excel File with Scans in it. The file is used in Attendance to Sync the data.
Keypad for Manually entering Member ID or Student ID.