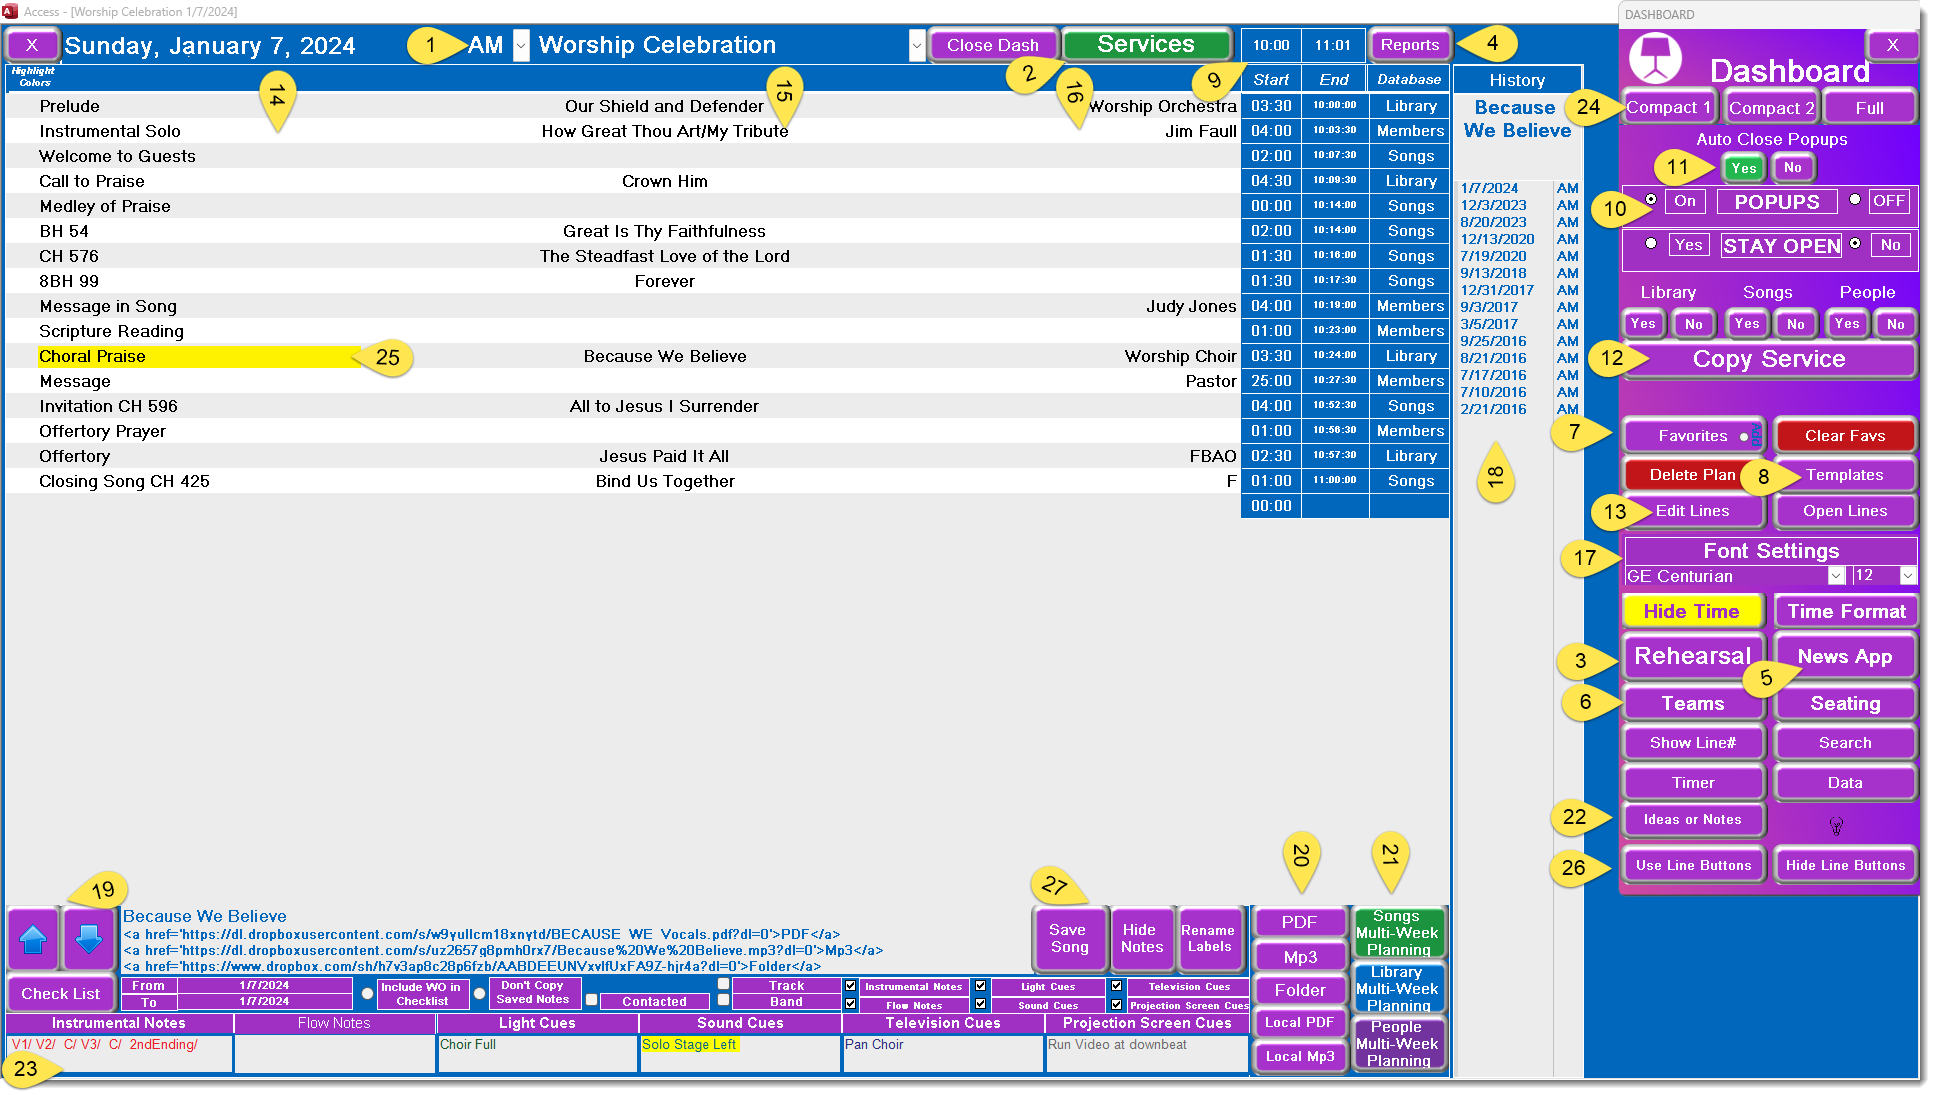
Service Worksheet
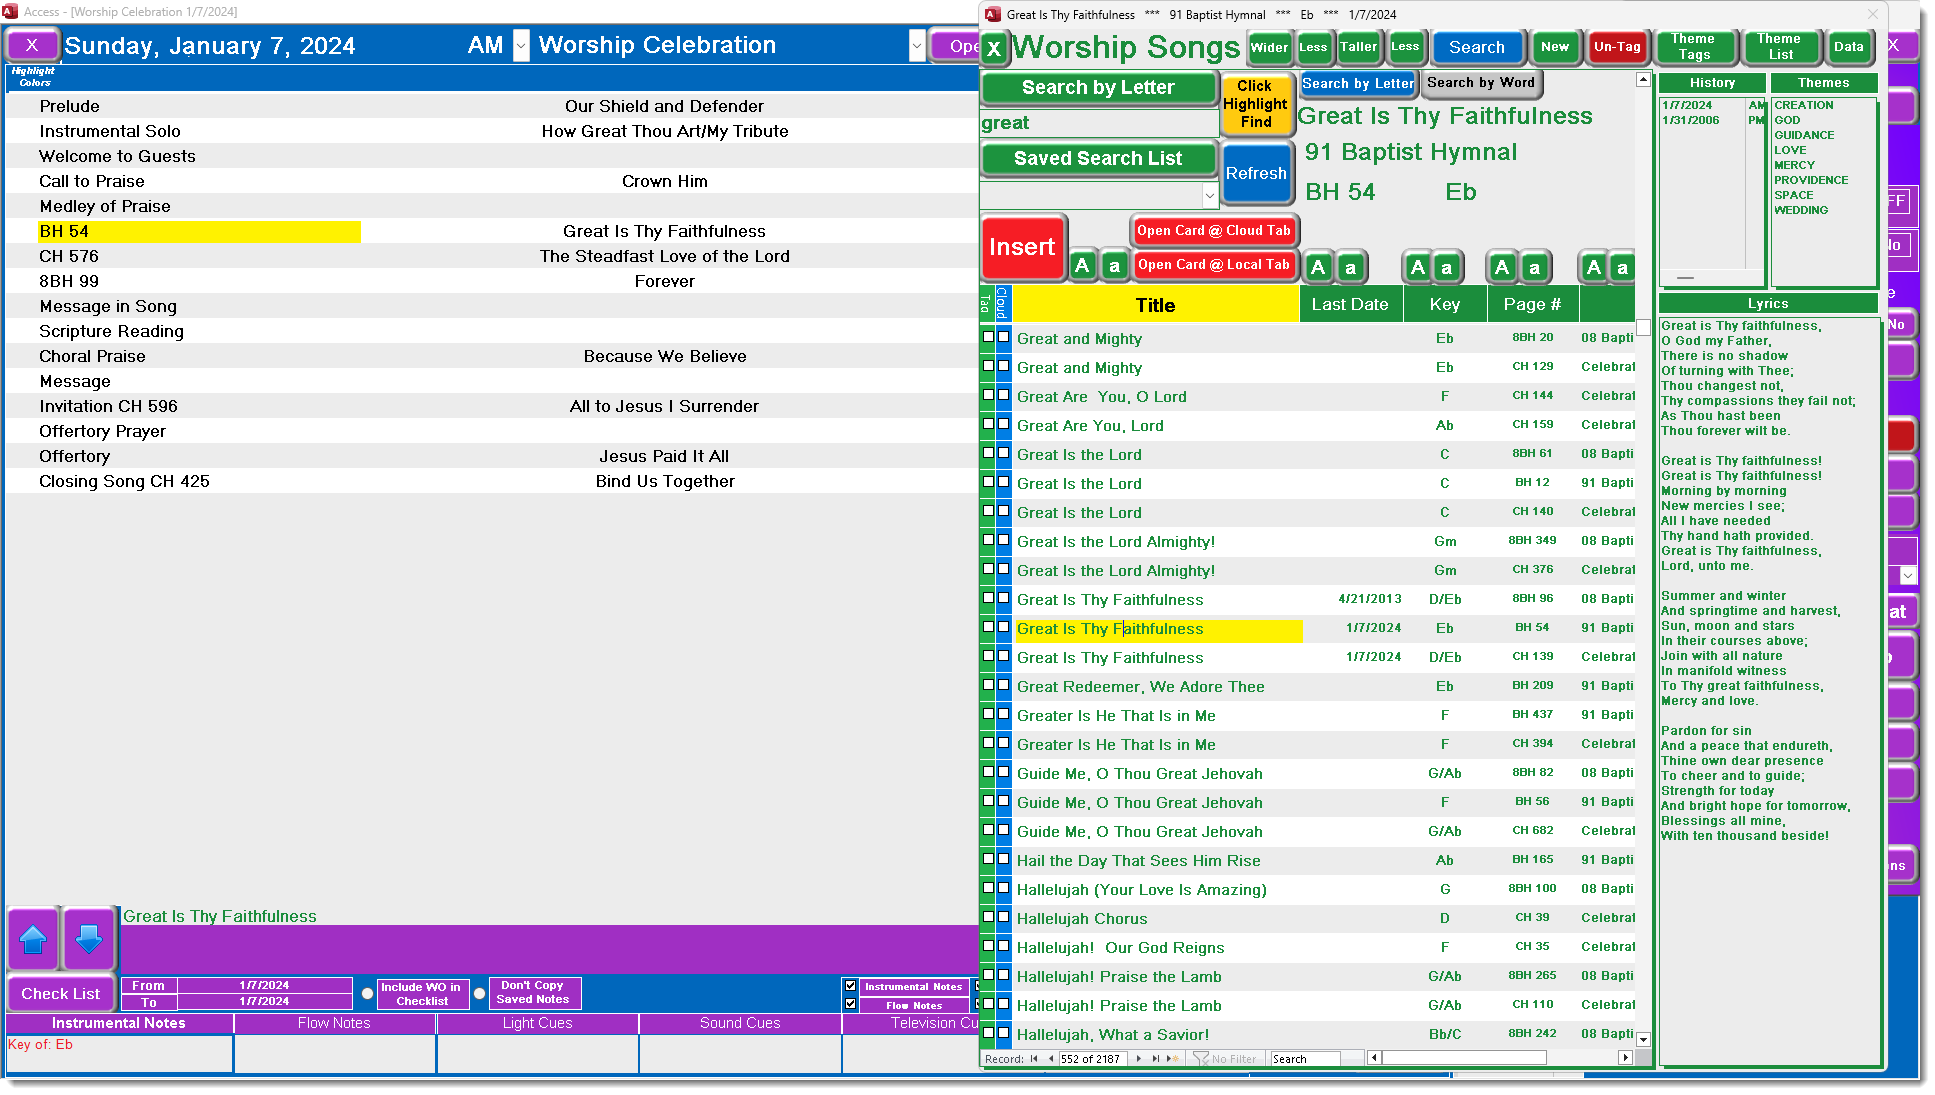
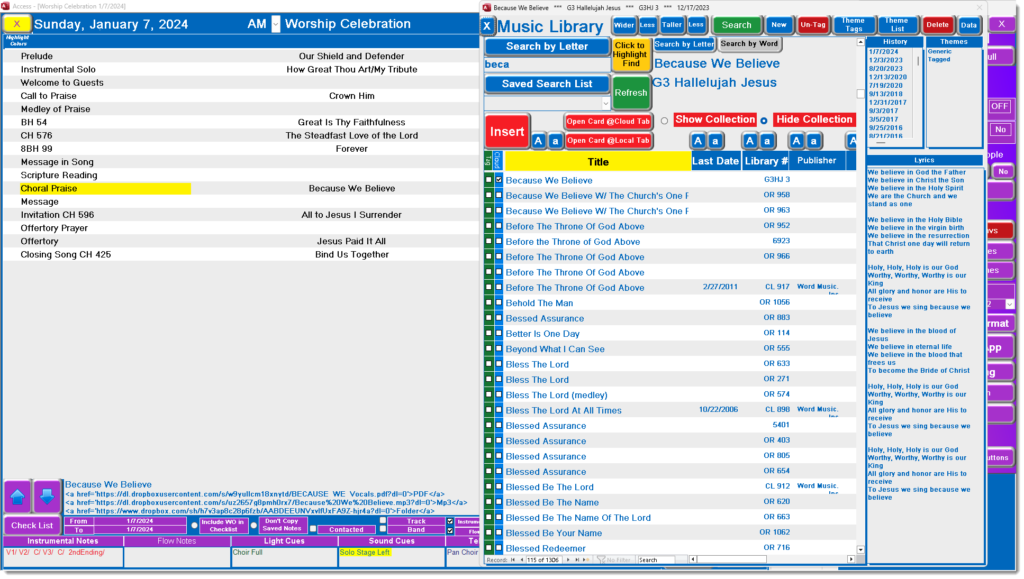
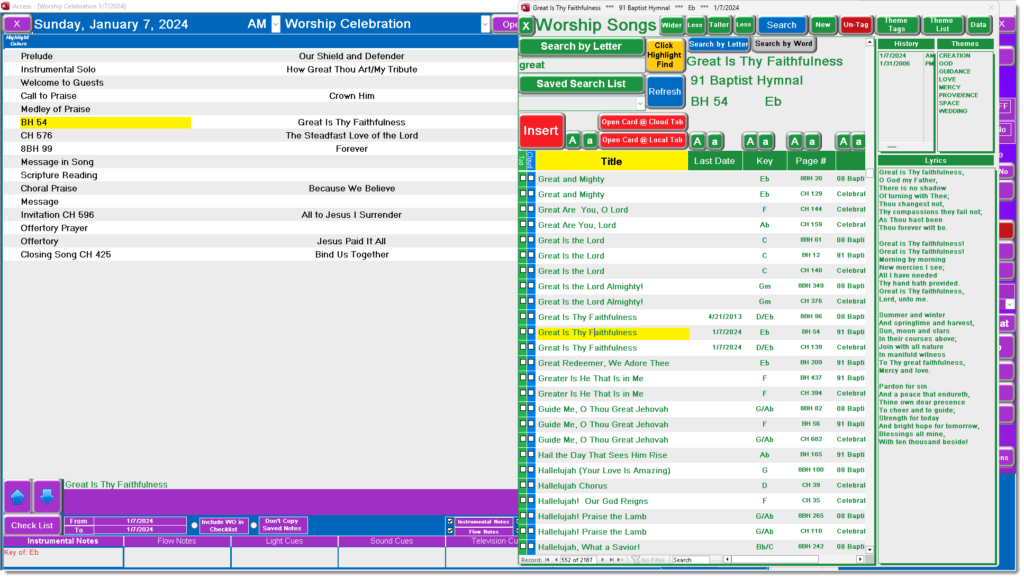
The Worksheet is the hub of WorshiPlanner. It is a series of independent lines linked to Library, Songs, or Member databases. Label a line Call to Worship on the left side, Adult Choir on the right side, and use the Library database. Edit this line, and the Music Library appears on the screen. Double-click to select a song and it is entered on this line. When the song title is in the worship order, its history usage is tracked.
The basic unit of the Service Worksheet is the line. Each line is associated with a database (Library, Songs, or Members).
 The Worksheet by the Numbers
-
- Service Date and Name
- Services – Click to select service to edit
- Rehearsals – Go to Rehearsals
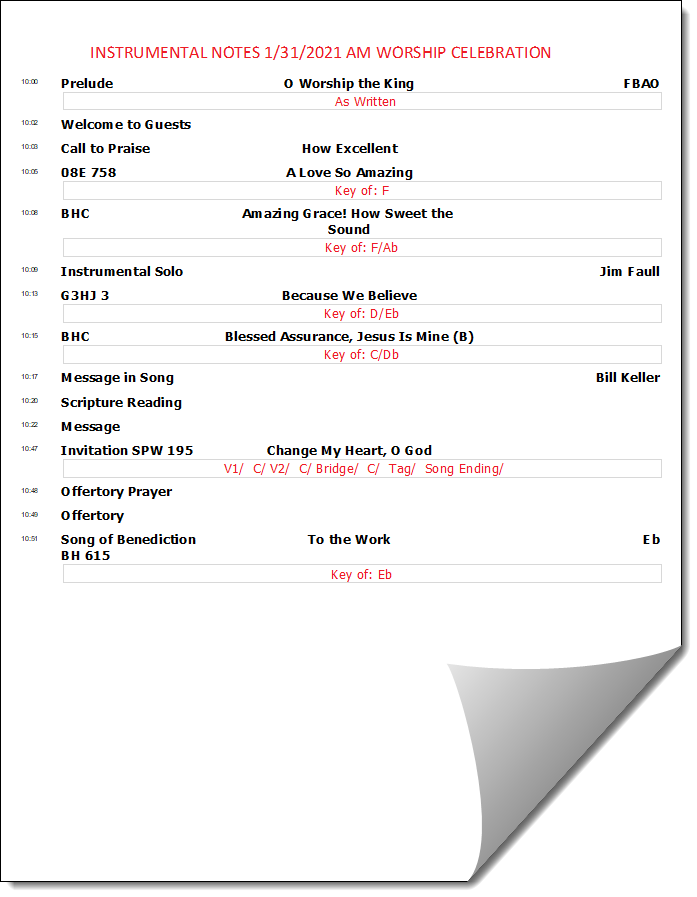
- Reports – service flow, instrumental notes, etc. text lists, roadmaps, web links
- App Setup – Go to App Dashboard
- Teams – Praise and Tech Team Assignment Form
- Favorites – Move-able and adjustable Library, Worship Songs and People info forms
- Templates – Event name
- Service Start Times – Enter start time in hh:mm format
- Turn Popups On or Off
- Auto Close Popups– After Selecting a Song or Member Close the Popup
- Copy Service or Rehearsal– duplicate services or rehearsals
- Edit Individual Lines or Open Line List
- Left Line Heading – Double Click to change Line Type
- Center Value – Double Click to Open Song or People Popups
- Right Value – Double Click to Open Song or People Popups
- Font Options – Click to select Fonts for Worksheet
- History Panel – displays history for this song or person
- Up and Down Button – Re-sequence line positions
- Cloud and Local Links – Shows PDF, Mp3 or Folder links
- Multi -Week Plans – Edit upcoming Library, Worship Songs or Soloists on this form
- Service Ideas/Notes – sticky notes for service ideas/notes to for Flow Charts
- Edit Notes and Cues for Flow Charts – double click to enlarge
- Compact or Full Size of Dashboard
- Line with Focus
- Use or Hide Single Click Buttons in Worksheet
- Manage Flow Notes for this Song
 The Worksheet Popup Forms
-
- Music Library
- Worship Songs
- Soloists – Requires a Group in Membership named Soloists
 Templates and Favorites
 Templates are created by adding the word “Template” to a service title. Be sure to delete the word “Template” before duplicating that service.
Favorites are selected by clicking the Add radio button on the Favorites button. It adds a Star to that service and puts it in the list of Favorites.
Double Clicking
Double clicking opens the many forms that are behind the Worksheet. Nearly every area of the Worksheet has double click zones.
When the center of a line is double clicked, a list of songs or people appear for you to select. These are called Song Pick, Library Pick, or Member Pick forms. By double-clicking a song title or soloist’s name, that data is immediately entered on the Worksheet. To erase a selected song or name, either select another to replace it, or replace the entire line.
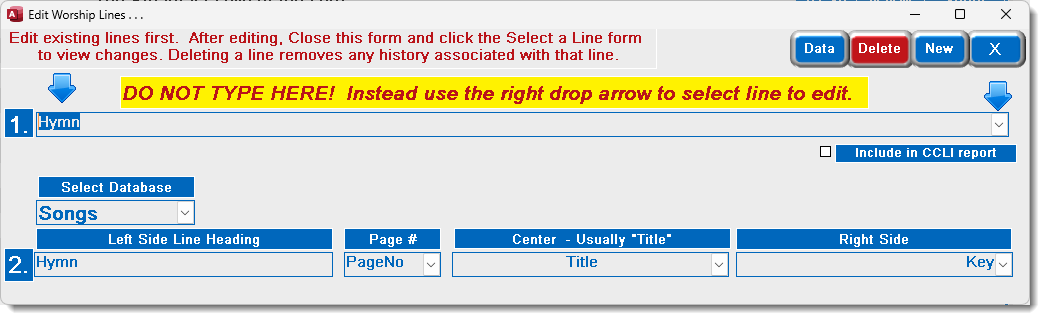
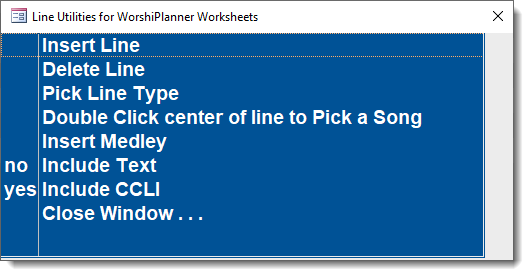
When the Right side of a line is double-clicked, the Select Line Form is opened.
Select Line Form

- Double click Left Line Heading to view this form
- Choose what kind of line you want this line to be.
- Select by Double-Clicking the line
- To erase a selected song title or member name, select the same line type to overwrite the line
Edit Line List

- After opening the Select a Line form, click Edit Lines
- Select the line to edit from the list in #1
- Best to edit existing lines that you will never use than create an over-abundance of extra lines
- The Type Text for Group Name is available for Library lines only.
- When done, click the X .
Duplicating Worship Orders

- Select the Worship Order to copy
- Open the Tools menu
- Click the Copy current worship order button
- Type the number of weeks you wish to duplicate (usually 13 to 52 weeks)
- Enter the starting date for duplication by pressing the date on the Calendar
- Be sure to give the correct starting date, and the computer will add the correct dates to each of the Worship orders created.
Create Service Template from Scratch
- Click New (Worship Order)
- This creates a blank service with 2 lines (you will need to double click and select the kind of line you want)
- Type the title of your worship service or select Title from the list
- Select AM, PM M1, M2 or This will identify the service in which the song is used
- Right-Click a line to open the pop-up menu and click Insert Line
- Double click the left side of the new line to open the Select a Line form
- Select the line by double-clicking
- Repeat the last 3 steps to complete your template
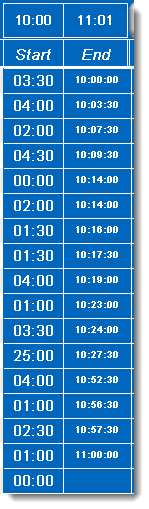
Calculate Event Times
- Enter event times for each line (03:30)
- Enter a service Start time (09:00)
- Click the event time for the top line
- Click the right side of the top line to calculate
Popup Menu
Activated by Right-Clicking
Create Service Template from Existing Service
The easiest way to create a template is to start with an existing service.
- Open the service you want to use
- Click the Worksheet Tools button
- Copy the service to today’s date
- Close the service and re-open Service Worksheet
- Double-click the first line that has a song or member
- Replace that line with the line that matches it in the Select a Line form
- Repeat the last 2 steps to complete your template
- The service is ready to copy
- After copy you can add the word Template to the title of this service, or delete it.
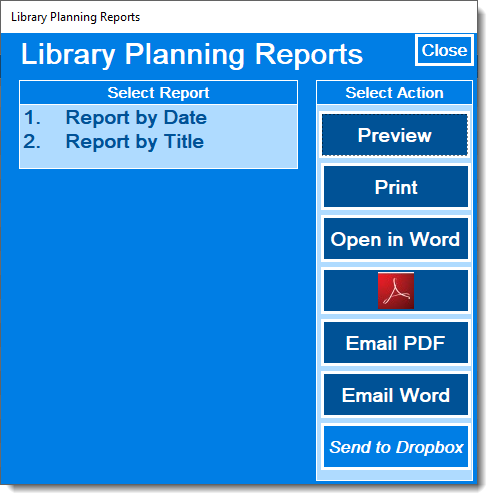
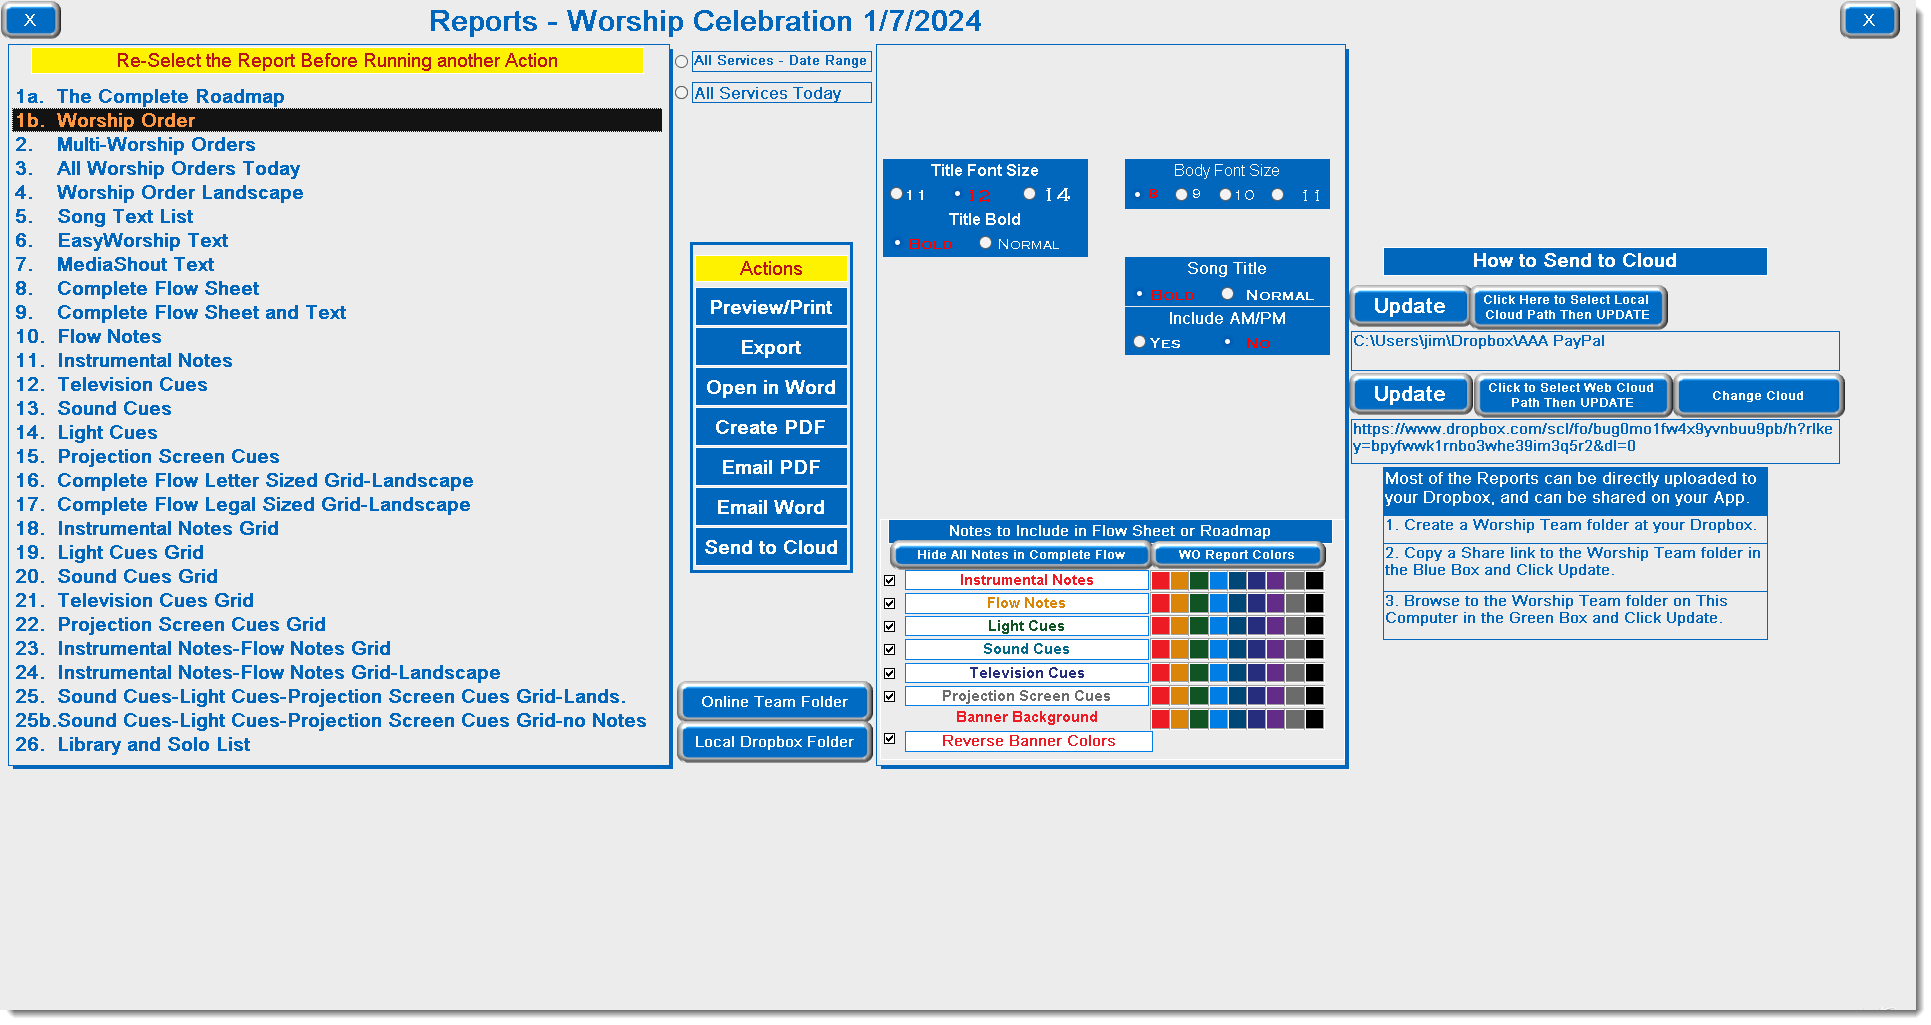
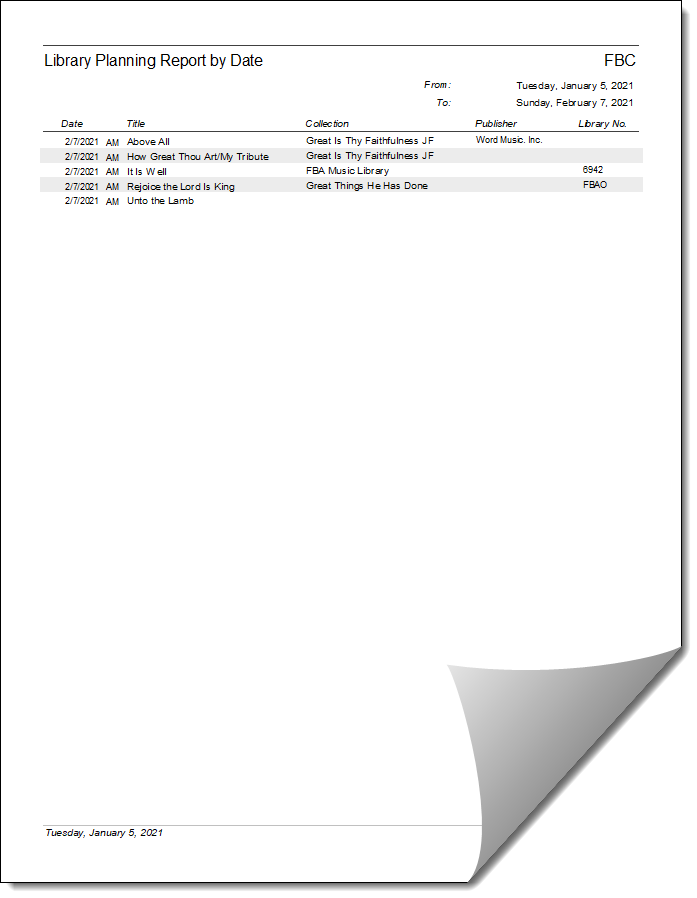
Worksheet Reports
Most reports are available in multiple formats. emailing a PDF report is a on1 step process that creates the PDF, opens the Email component, and attaches the PDF to the email.

Worksheet Report- Select Report – click to slect
- Edit Fonts, Alignment, etc.
- Select the Team Folder in Dropbox on this computer
- Select the Team Folder in Dropbox on the Internet
- Click to Open the Team Folder on your Internet Dropbox account
- Select Mode of Report
Teams and Bands
This module is for selecting team members for Praise Team or Band, Tech Teams, etc. Once a Team is selected, a Red ball appears on the View Teams button below the Teams and Bands button.
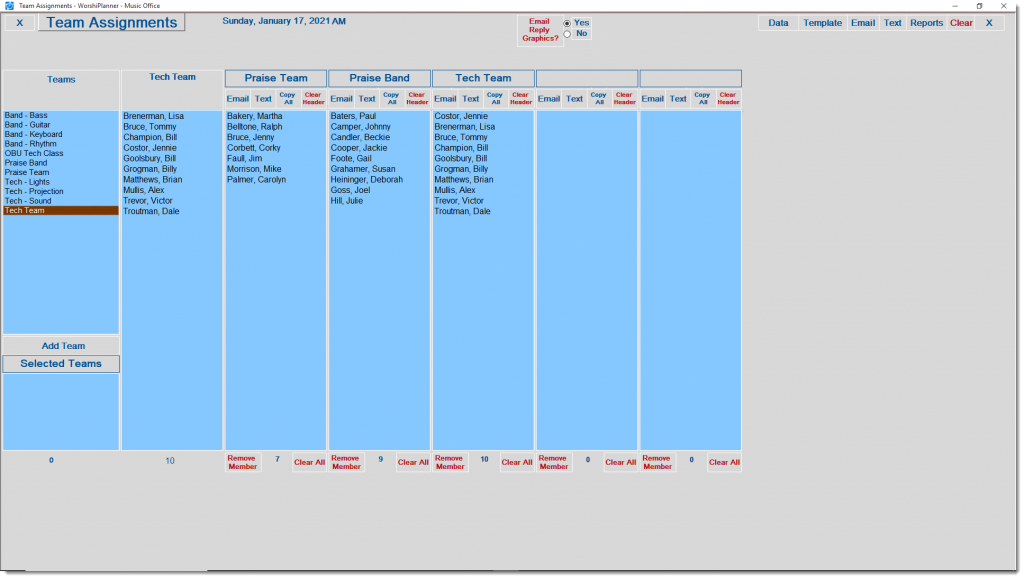
- Requires groups in Membership that include the words Team, Tech or Band
- Team lists can be included on Worksheet Reports
- Select Team on left
- At the top of a black box under the date, click to drop a list of teams and bands
- Select group for this box
- Drag and Drop members from the 2nd column to your box
- To include the entire group, click the icon next to the trash can at the right of the top of the black box
- To Clear the list, click Clear All
- To remove one member, click their name and then the trash can at the bottom of the box
Email or Text Team
For everyone on a team this Sunday, use the Email or Text button at the top of the page. To send to just selected members on one team, use the Email or Text button on that box.
History Pane
The History Pane appears on the right when a song or member name is touched in the Pick Form for that database, or a line is touched where a song or member has been added. If ever a wrong song title or member name appears in the History Pane, it means that the song title or member name was not selected from the list in the Pick Form, but was typed or pasted there.
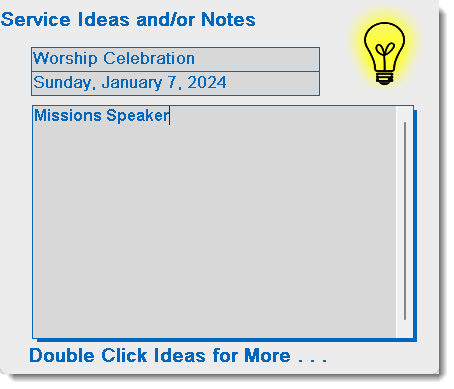
Service Ideas
Service Ideas can be stored by clicking the Light Bulb on the bottom right. When an idea is entered, the Light Bulb turns on.
Multi-Week Plans
 Somewhere, every choir director keeps a list of upcoming songs. This is the easy way, assuming you have duplicated services into the future.
- Click the button (Library, Soloists, or Songs)
- Select the To Date
- Every line from every service in the date range with that database will display
- Add songs or members as in the Worksheet
- Reports of your choices are available at the top of this form
- Newly added data will appear in the appropriate Service Worksheet